You can use this feature to add emojis to your titles and descriptions for use in SEO and social media meta tags.
In This Article
Tutorial Video
Getting Started
To add an emoji, click on the Emoji icon above the Title or Description field.
You'll see a popup displaying the emoji picker where you can select any emoji.
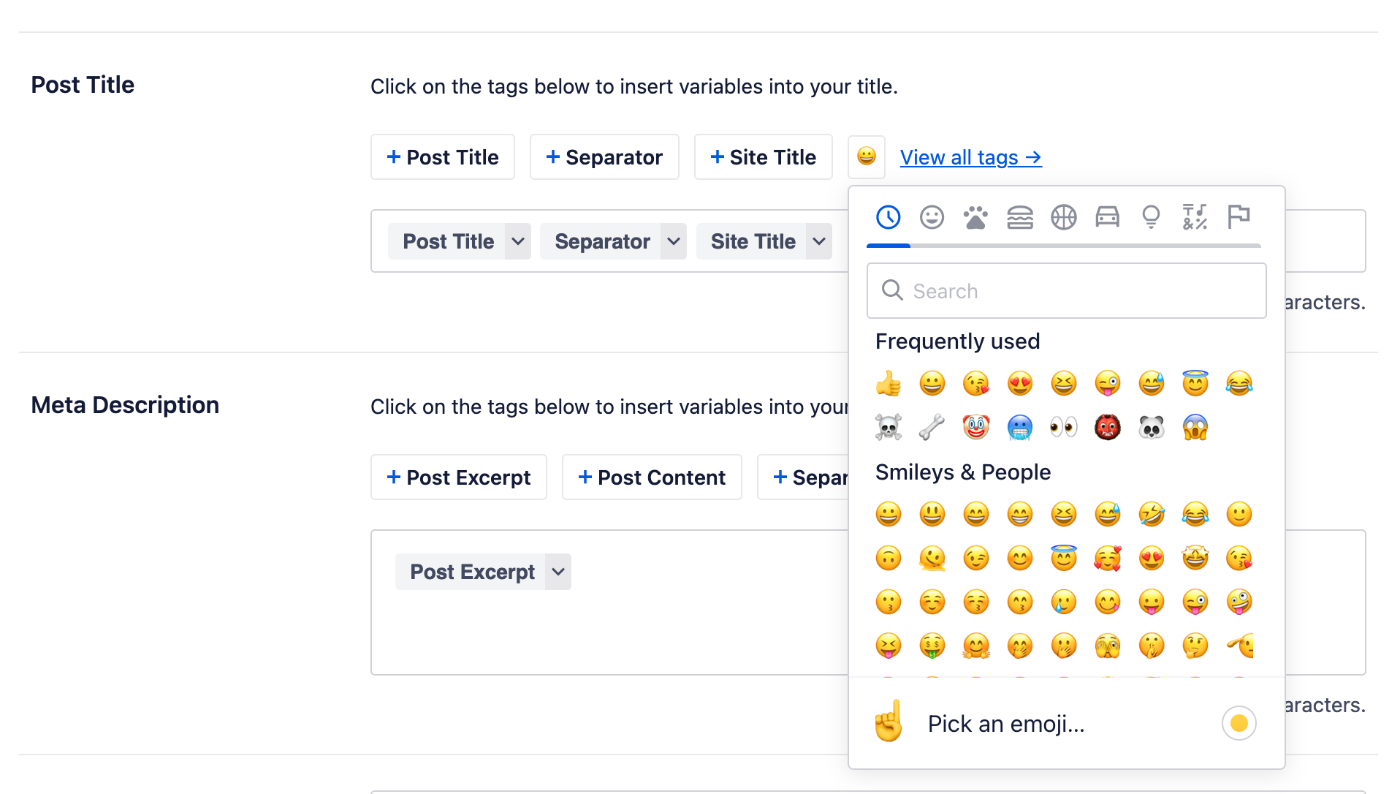
Select or search for an emoji to add to the Title or Description field.
You can delete an emoji from the Title or Description field by placing your cursor in front of the emoji and pressing the Backspace key on your keyboard.
The post Using the Emojis in Titles and Descriptions first appeared on AIOSEO.]]>This beginners guide will walk you through the simple steps to use these features for Facebook.
In This Article
Tutorial Video
Why Use the Social Networks Features?
These days a good presence on social media is just as important as a good presence on search engines.
You maintain this presence using your own Facebook Page or profile, but also through Like and Share buttons on your website where visitors can share your content on their Facebook profile.
When your content is shared on Facebook, it may be displayed with a title, description and an image like the example below.

Your goal is to attract the attention of people as they scroll through their Facebook feed and get them to click on your content and visit your site.
The Social Networks features in All in One SEO mean you can control how your content looks on Facebook, increasing the likelihood that people will see your content and click through to your site.
Now that we know why it's important, let's look at how we use All in One SEO to control how our content appears on Facebook.
Enabling Facebook Settings
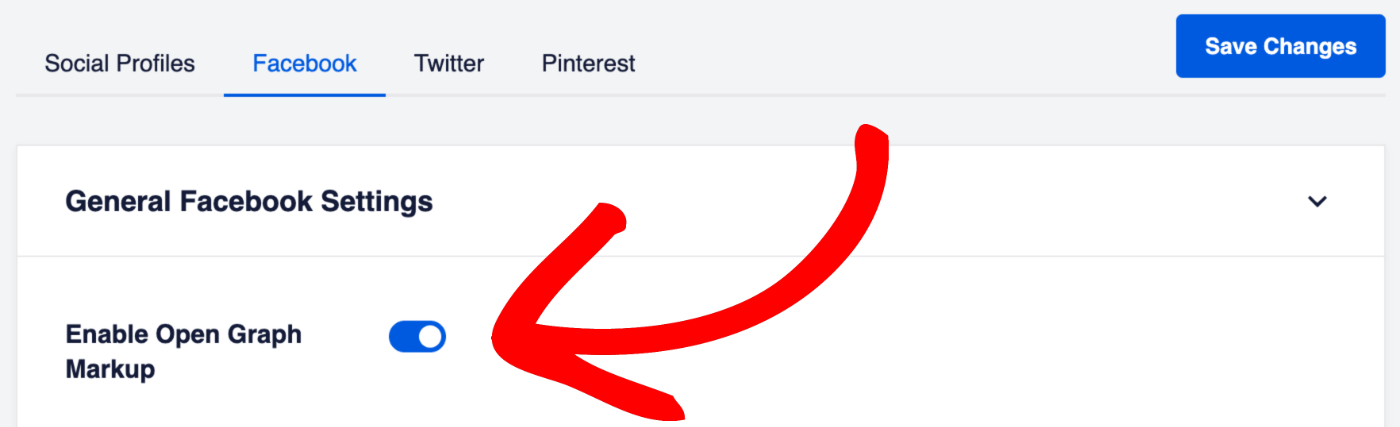
To get started, click on Social Networks in the All in One SEO menu and then click on the Facebook tab.
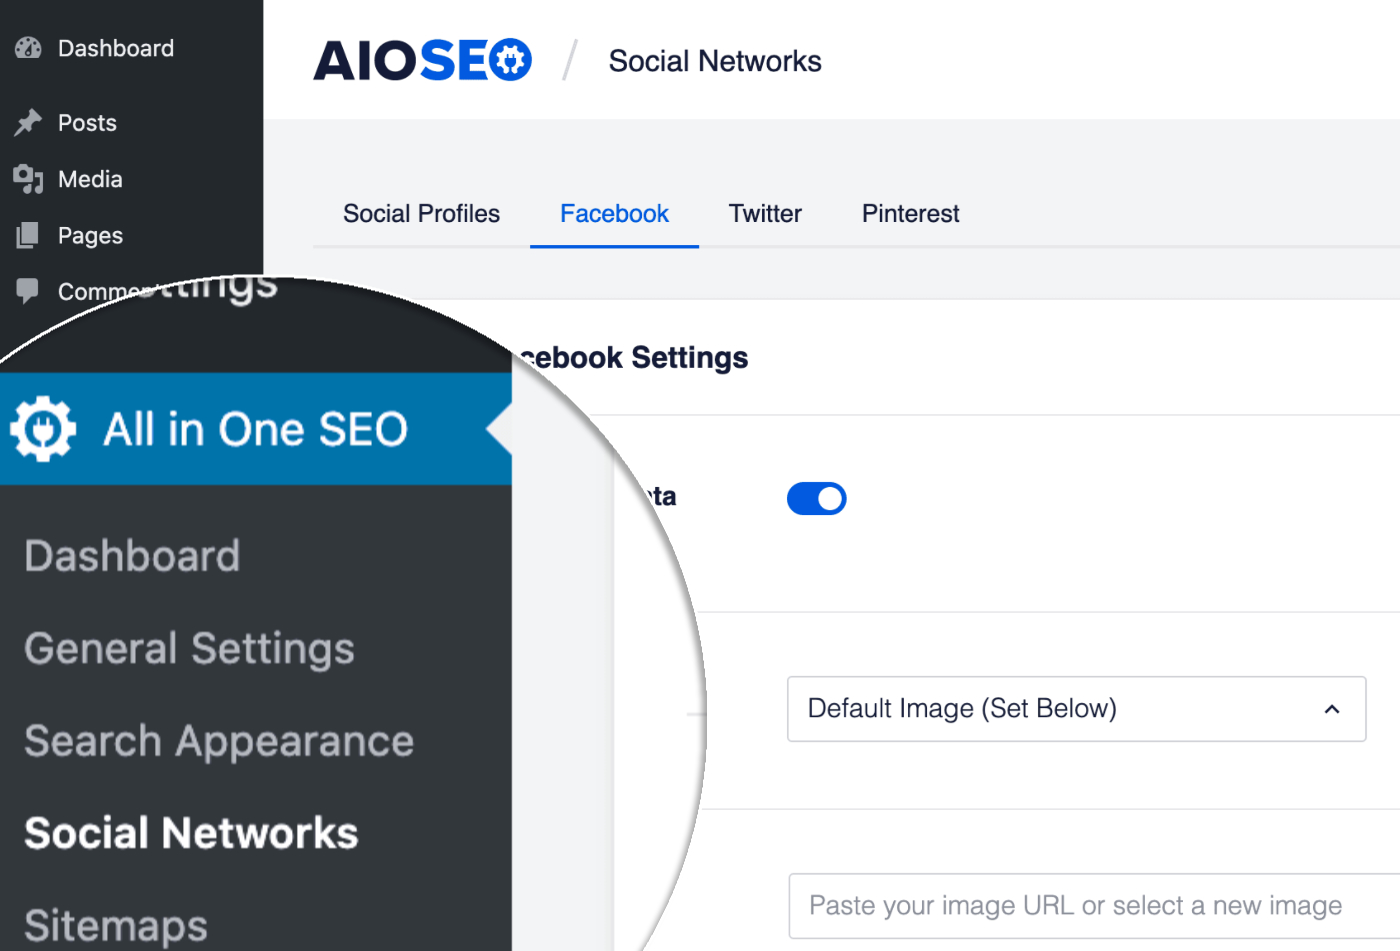
The first setting you'll see is Enable Open Graph Markup. Make sure this is enabled.
Facebook Image Settings
Next, we’re going to choose which image is used when your content is shared on Facebook. Follow these instructions for Setting the Facebook Image Source.
Once you've done that, you can set a default Facebook image which will be used as a fall back if no other image is set. Follow these instructions for Setting the Default Facebook Image.
Facebook Object Types
Next, we'll set the Object Types for our content. Facebook uses these to determine the appearance of your content when it's shared.
Follow these instructions for Setting the Default Object Types for Facebook.
Home Page Settings for Facebook
Now we're going to move on to setting the title, description and image for your homepage.
Where you set this will depend on whether your homepage is set to display your latest posts, or is set to a static page. If you're not sure, just go to Settings » Reading on your site and check the Your homepage displays setting.
If your homepage displays your latest posts, then follow these instructions for Setting the Facebook Social Meta When Your Homepage Displays Your Latest Posts.
If your homepage displays a static page, then follow these instructions for Setting the Facebook Social Meta When Your Homepage Displays a Static Page.
Individual Page/Post Settings
Now that we've set the Facebook settings for the homepage, let's set the title, description and image for an individual post or page.
Follow these instructions for Configuring the Facebook Settings for Your Content.
The post Beginners Guide to Social Networks Settings for Facebook first appeared on AIOSEO.]]>This beginners guide will walk you through the simple steps to use these features for Twitter.
In This Article
Tutorial Video
Why Use the Social Networks Features?
These days a good presence on social media is just as important as a good presence on search engines.
You maintain this presence using your own Twitter profile, but also through Tweet buttons on your website where visitors can share your content on their Twitter profile.
When your content is shared on Twitter, it may be displayed with a title, description and an image like the example below.

Your goal is to attract the attention of people as they scroll through their Twitter feed and get them to click on your content and visit your site.
The Social Networks features in All in One SEO mean you can control how your content looks on Twitter, increasing the likelihood that people will see your content and click through to your site.
Now that we know why it's important, let's look at how we use All in One SEO to control how our content appears on Twitter.
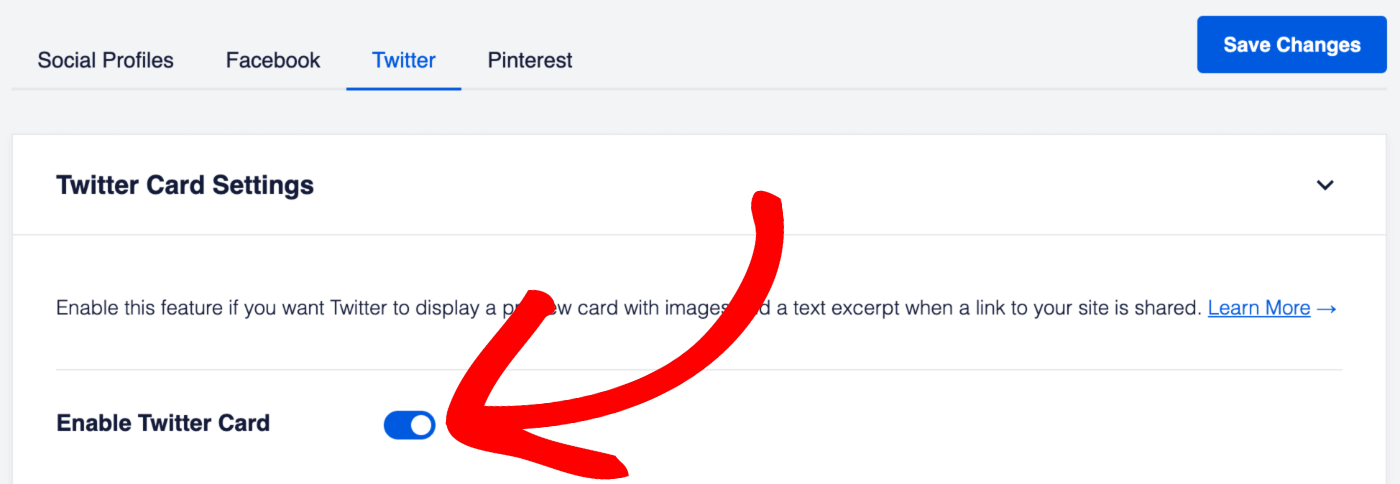
Enabling Twitter Settings
To get started, click on Social Networks in the All in One SEO menu and then click on the Twitter tab.
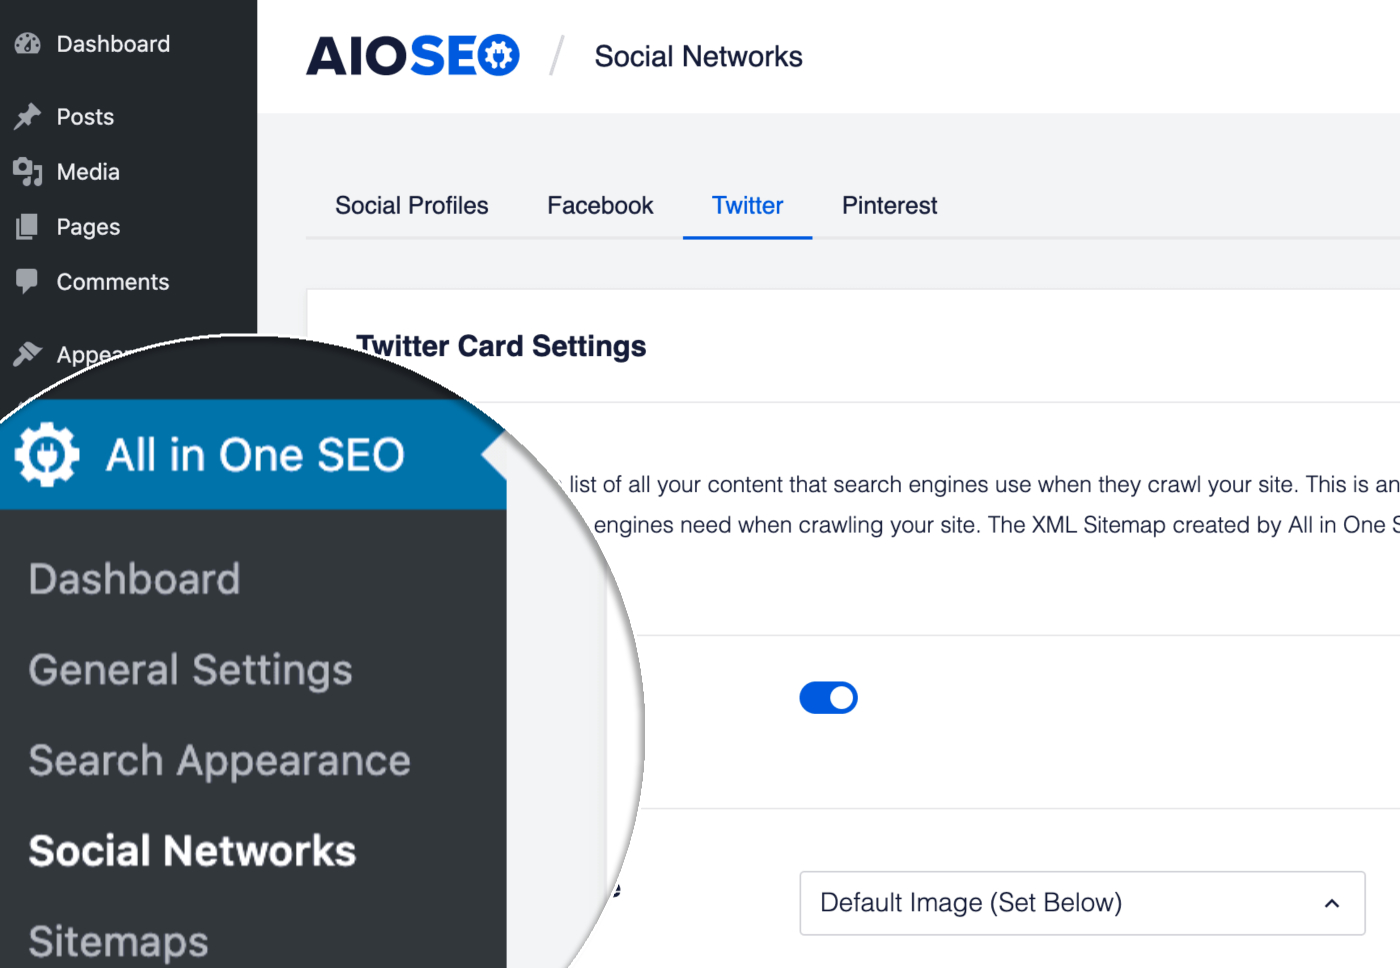
The first setting you'll see is Enable Twitter Cards. Make sure this is enabled.
Twitter Card Types
Next, we'll set the Card Type for our content. Twitter uses this to determine the appearance of your content when it's shared.
Follow these instructions for Setting the Default Twitter Card Type.
Twitter Image Settings
Next, we’re going to choose which image is used when your content is shared on Twitter. Follow these instructions for Setting the Twitter Image Source.
Once you've done that, you can set a default Twitter image which will be used as a fall back if no other image is set. Follow these instructions for Setting the Default Twitter Image.
Home Page Settings for Twitter
Now we're going to move on to setting the title, description, image and card type for your homepage.
Where you set this will depend on whether your homepage is set to display your latest posts, or is set to a static page. If you're not sure, just go to Settings » Reading on your site and check the Your homepage displays setting.
If your homepage displays your latest posts, then follow these instructions for Setting the Twitter Social Meta When Your Homepage Displays Your Latest Posts.
If your homepage displays a static page, then follow these instructions for Setting the Twitter Social Meta When Your Homepage Displays a Static Page.
Individual Page/Post Settings
Now that we've set the Twitter settings for the homepage, let's set the title, description and image for an individual post or page.
Follow these instructions for Configuring the Twitter Settings for Your Content.
The post Beginners Guide to Social Networks Settings for Twitter first appeared on AIOSEO.]]>If you do, then this article will walk you through the easy-to-follow steps to do this.
The instructions in this article apply to Posts, Pages, Media Attachments, any Custom Post Types, Categories, Tags, and any Custom Taxonomies. We're using the Add New Post screen in the screenshots below.
In This Article
Tutorial Video
Facebook Settings
To get started, edit your content and scroll down to the AIOSEO Settings and click on the Social tab.
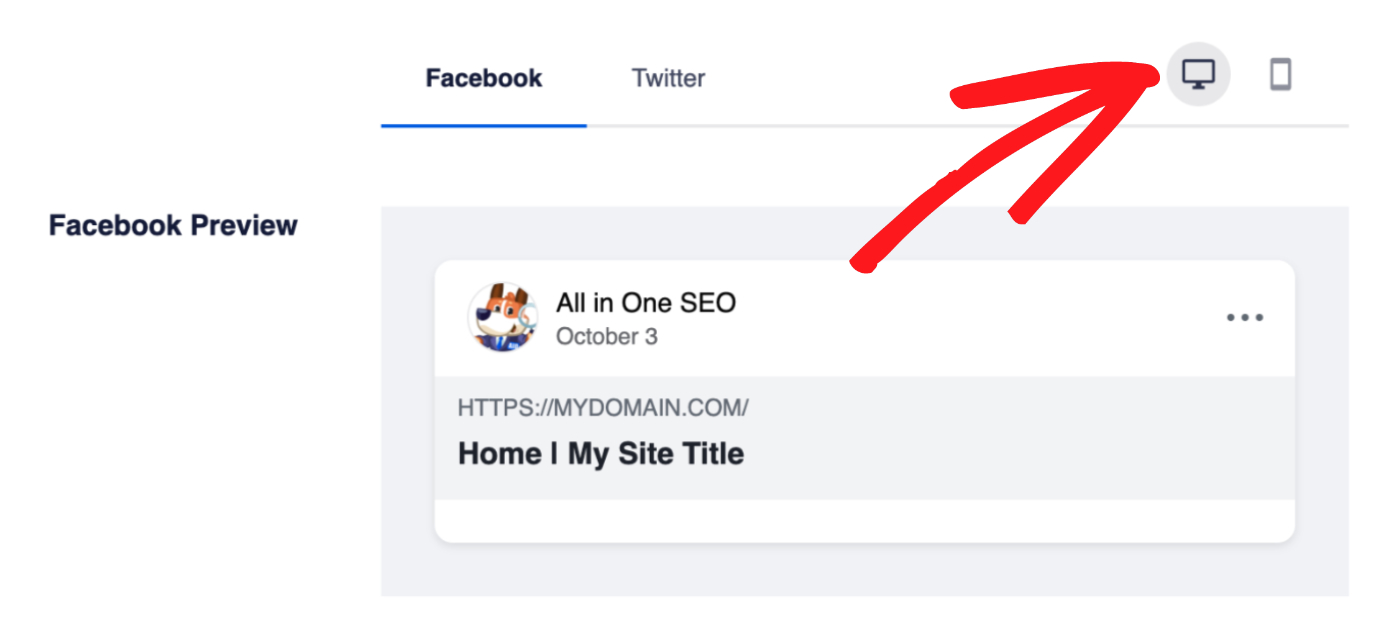
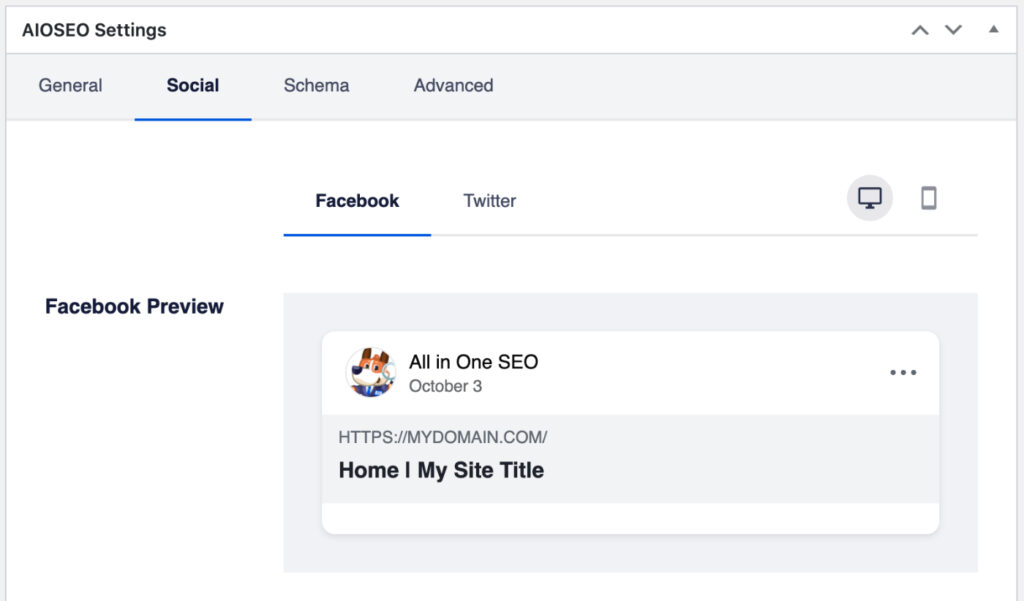
You should see the Facebook tab where you’ll see the Facebook Preview, Facebook Title, Facebook Description, Image Source, Video URL, and Object Type settings.
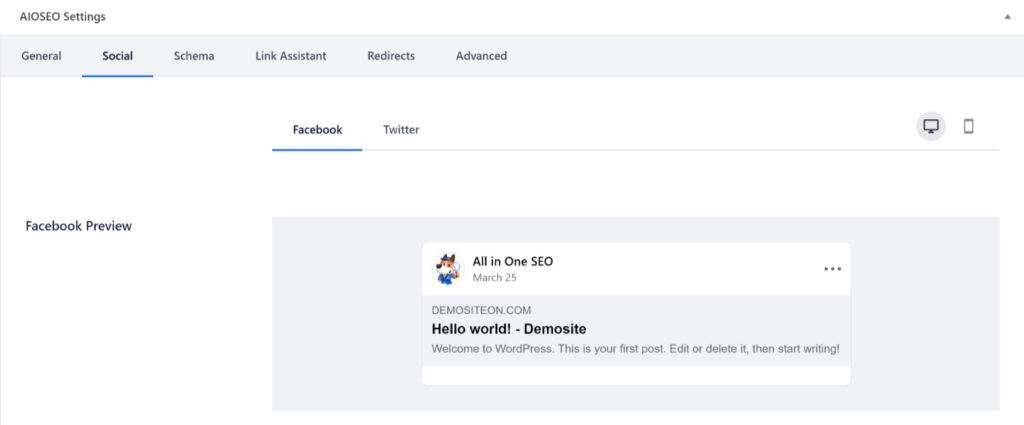
The Facebook Preview shows how your content should look when posted on Facebook based on the Title, Description, and Image or Video you set. There are icons in the top right corner to view how it may look on desktop or mobile.
Setting the Facebook Title
To set the Facebook title for this content, click on one of our smart tags shown above the Facebook Title field.
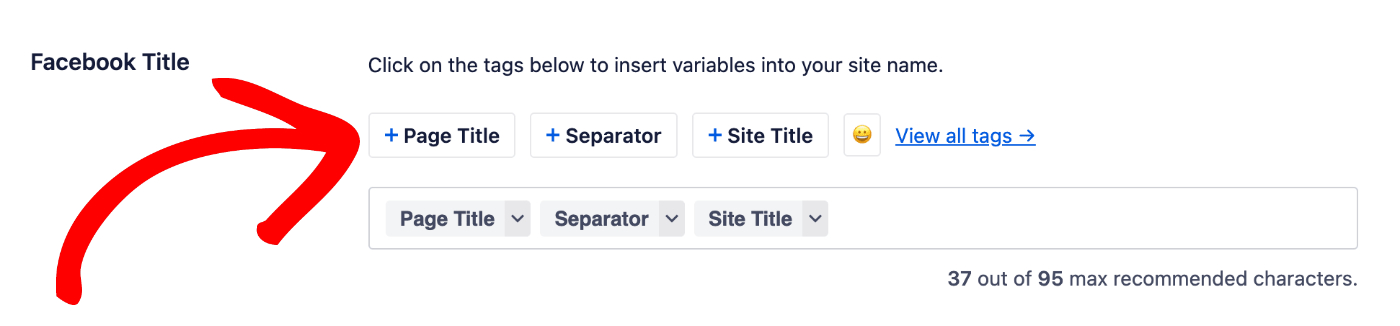
You can also type the hash character ( # ) in the field to display a list of available tags you can choose from.
You can also enter text in the Facebook Title field or combine text with the smart tags and there’s an emoji picker where you can add an emoji.
NOTE:
If you leave the Facebook Title field empty, then All in One SEO will automatically use the SEO Title entered in the General tab.
Setting the Facebook Description
To set the Facebook description for this content, click on one of our smart tags shown above the Facebook Description field.
You can also type the hash character ( # ) in the field to display a list of available tags you can choose from.
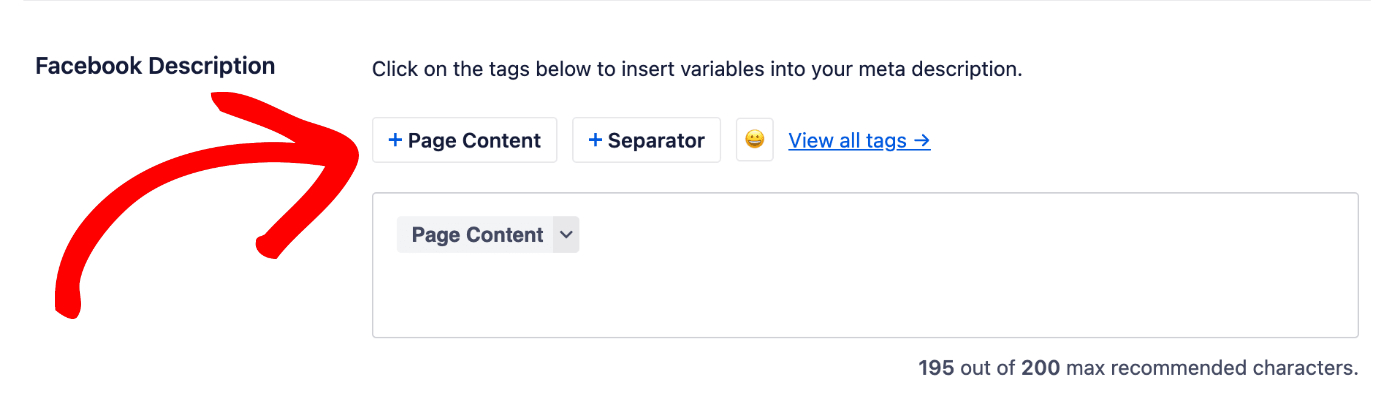
You can also enter text in the field or combine text with smart tags and there’s an emoji picker where you can add an emoji.
NOTE:
If you leave the Facebook Description field empty, then All in One SEO will automatically use the Meta Description entered in the General tab.
Setting the Facebook Image
Next, we’re going to set the image.
You can do this using the Image Source setting. Click the drop down to see the available choices.
You can select Custom Image and a Facebook Image setting will be displayed where you can upload an image, select an image from your Media Library or paste the URL for an image.
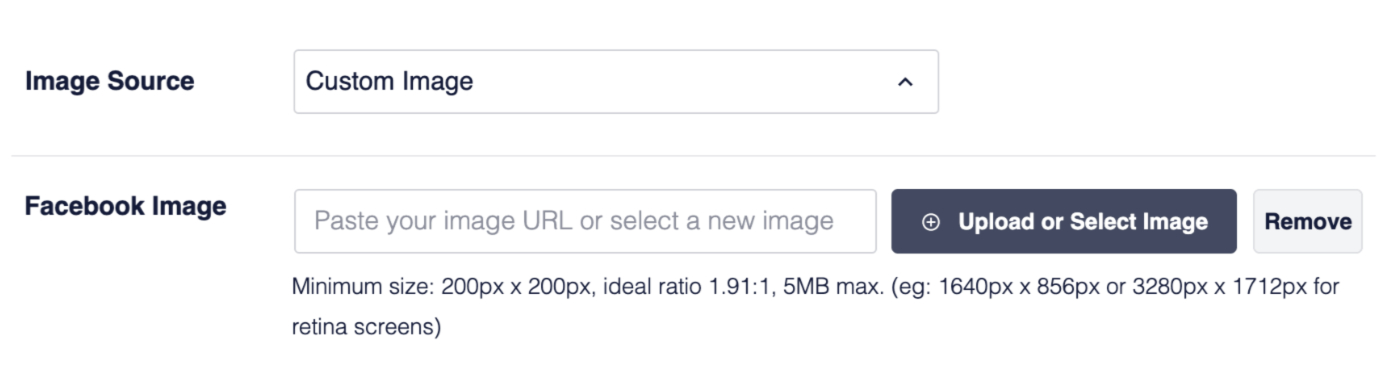
IMPORTANT:
Facebook prefers images that are 1200 pixels wide by 630 pixels tall. The minimum dimensions they accept are 200 pixels by 200 pixels. Full details can be found in Facebook’s documentation here.
Setting the Facebook Video
As an alternative to an image, you can also set a video. Just paste the URL for any video in the Video URL field.

Setting the Facebook Object Type
Next, we’re going to set the Object Type.
You can set this in the Object Type drop down. Select the type that best describes this content.

Setting the Article Section and Article Tags
Finally, you'll see the Article Section and Article Tags fields. These fields are both optional.

The Article Section field can be used to list the category or categories your post is in.
The Article Tags field can be used to list the tags you've added to your post.
That’s all! You’ve now set the social meta that Facebook will use when this content is shared.
The post Configuring the Facebook Settings for Your Content first appeared on AIOSEO.]]>If you do, then this article will walk you through the easy-to-follow steps to do this.
The instructions in this article apply to Posts, Pages, Media Attachments, any Custom Post Types, Categories, Tags, and any Custom Taxonomies. We're using the Add New Post screen in the screenshots below.
In This Article
Twitter Settings
To get started, edit your content and scroll down to the AIOSEO Settings and click on the Social tab and then on the Twitter tab.
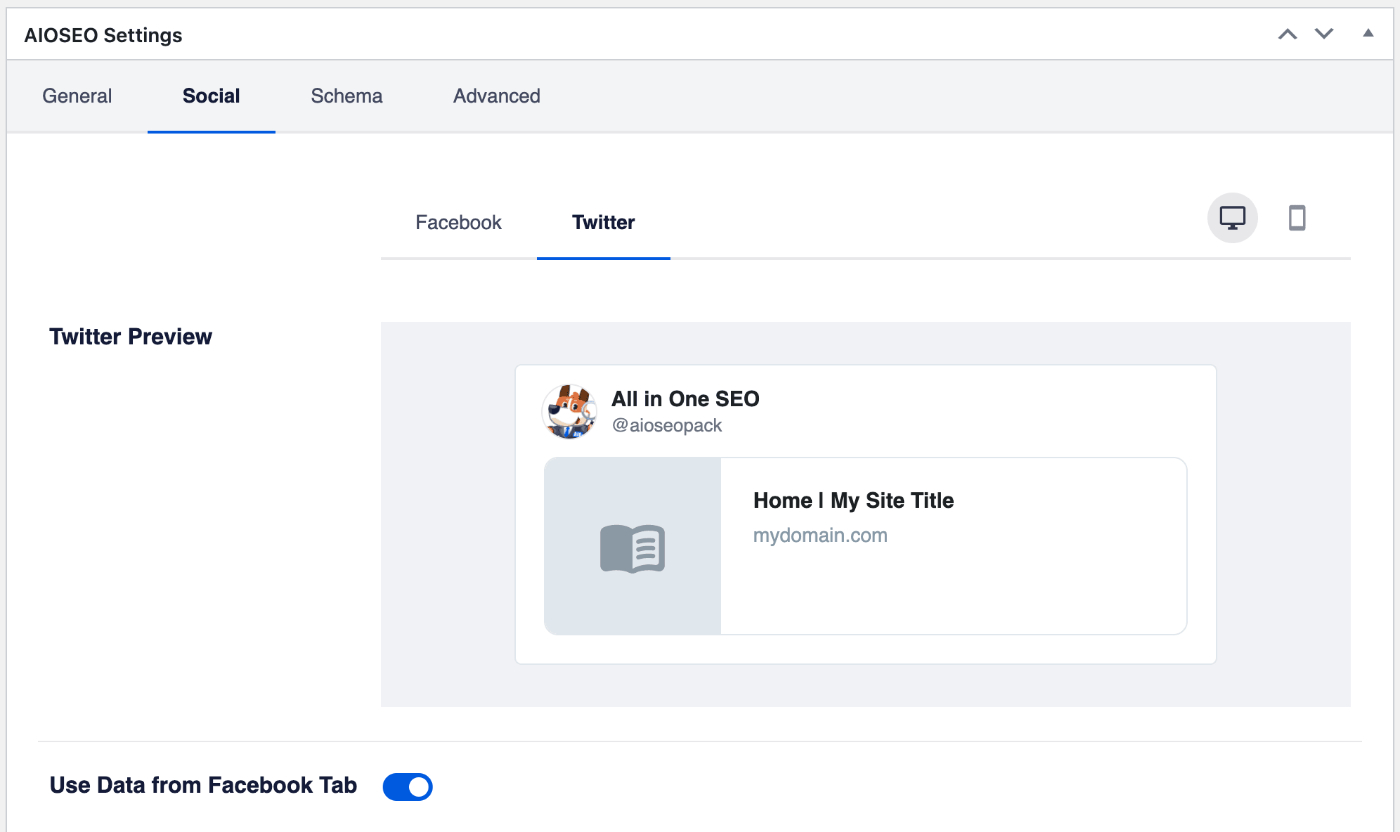
You should see the Twitter Preview, Use Data from Facebook Tab, Twitter Title, Twitter Description, Image Source, and Twitter card Type settings.
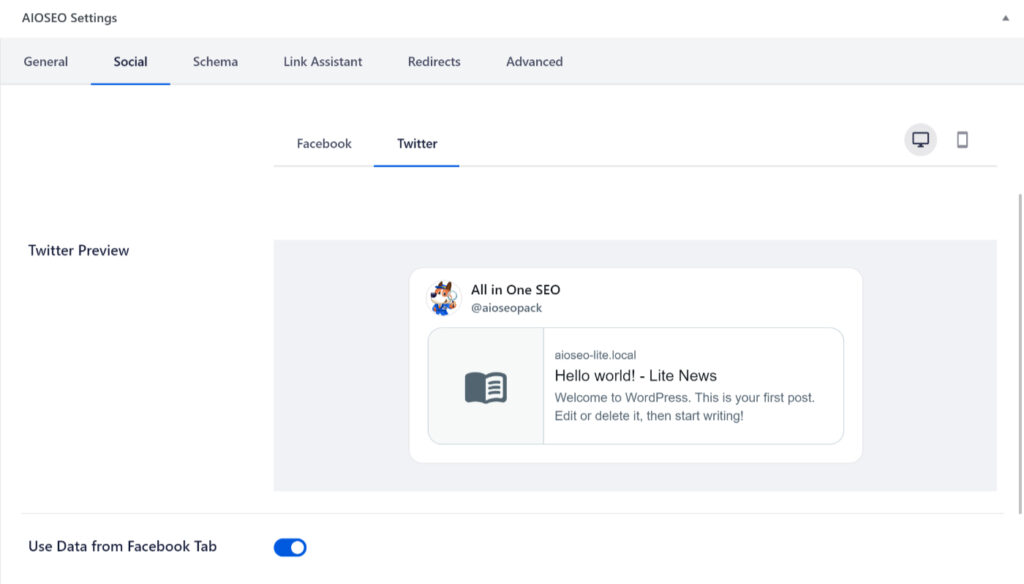
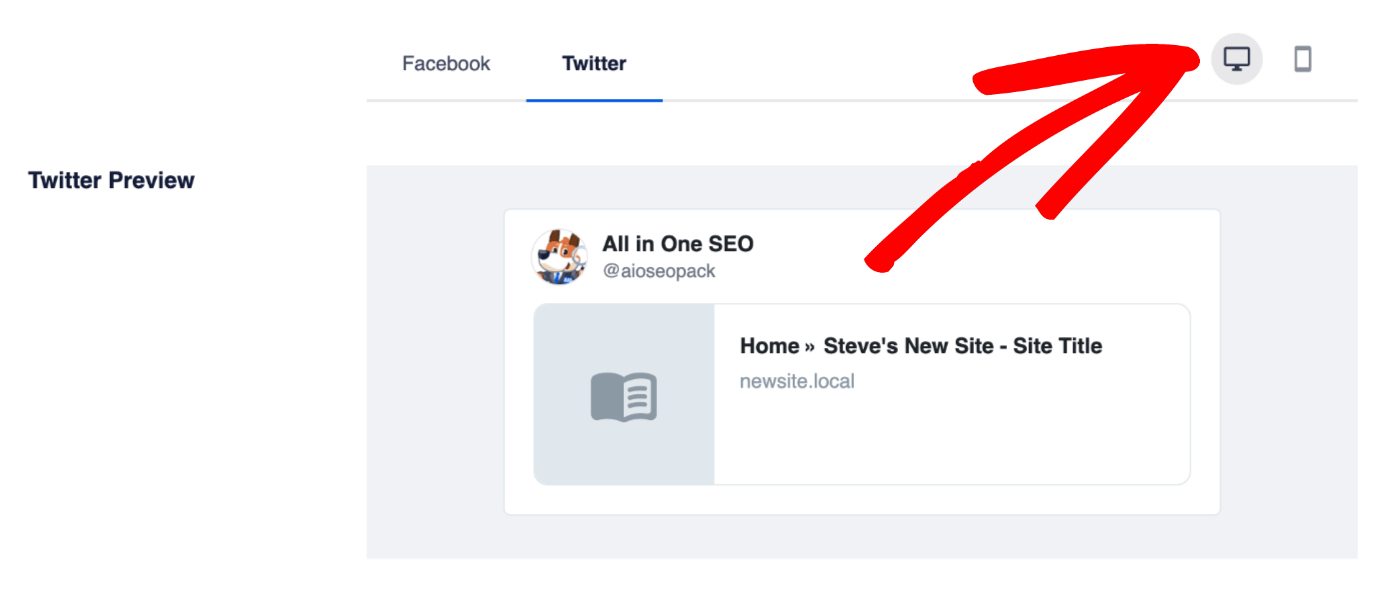
The Twitter Preview shows how your content should look when posted on Twitter based on the Title, Description, Image, and Card Type you set. There are icons in the top right corner to view how it may look on desktop or mobile.
If you want to use the Title, Description, and Image set on the Facebook tab as the Twitter title, description, and image, then enable the Use Data from Facebook Tab setting.

Setting the Twitter Title
To set the title for your homepage, click on one of our smart tags shown above the Twitter Title field.
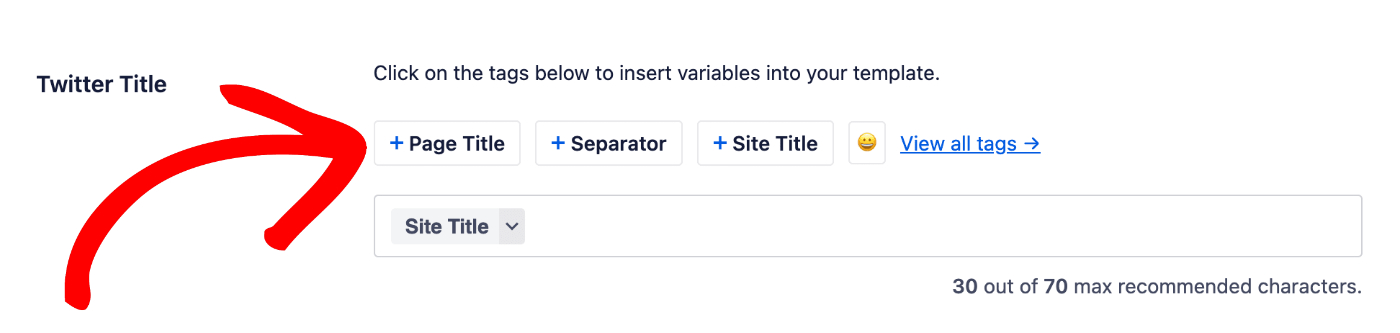
You can also type the hash character ( # ) in the field to display a list of available tags you can choose from.

You can also enter text in the Twitter Title field or combine text with the smart tags and there’s an emoji picker where you can add an emoji.
NOTE:
If you leave the Twitter Title field empty, then All in One SEO will automatically use the Facebook Title if set or the SEO Title entered in the General tab.
Setting the Twitter Description
To set the Twitter description for this content, click on one of our smart tags shown above the Twitter Description field.
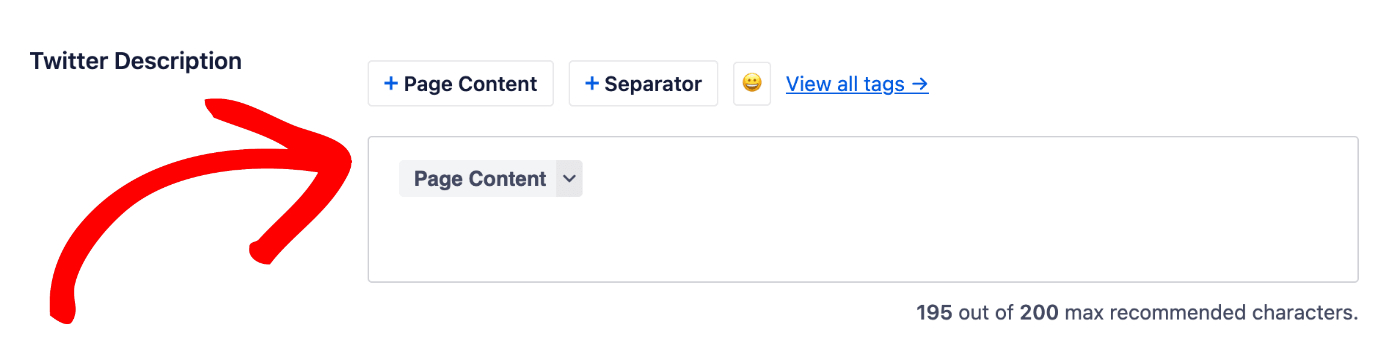
You can also type the hash character ( # ) in the field to display a list of available tags you can choose from.
You can also enter text in the field or combine text with smart tags and there’s an emoji picker where you can add an emoji.
NOTE:
If you leave the Twitter Description field empty, then All in One SEO will automatically use the Facebook Description if set or the Meta Description entered in the General tab.
Setting the Twitter Image
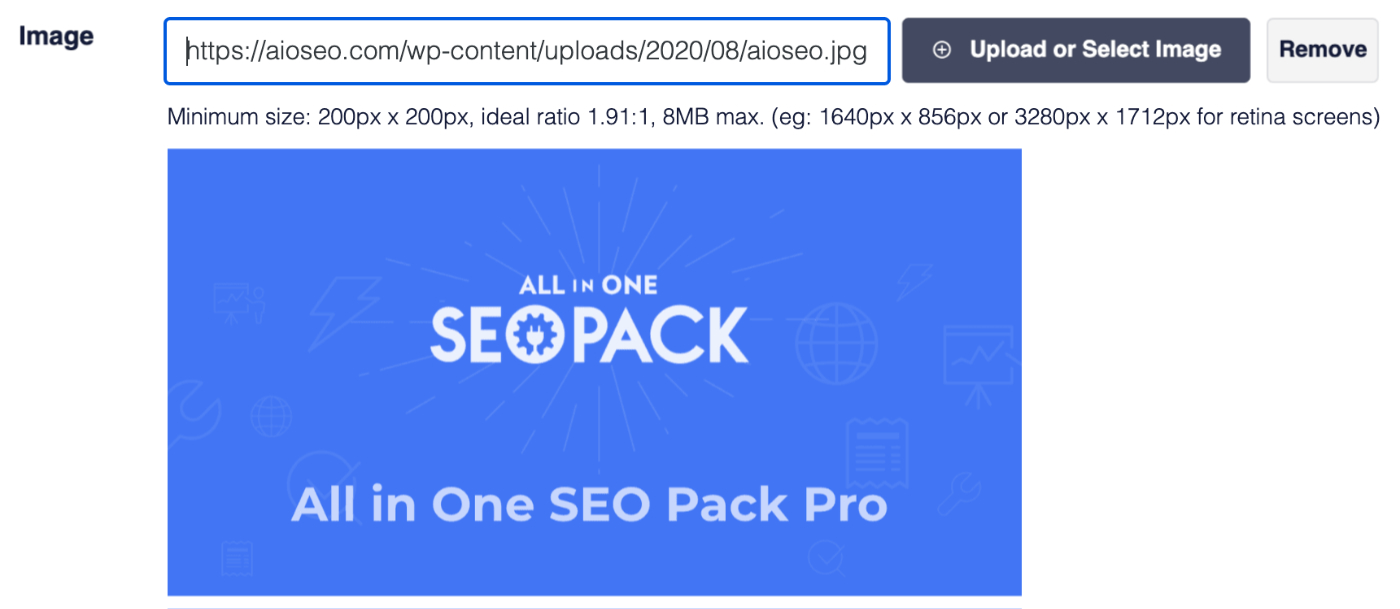
Next, we’re going to set the image.
You can do this using the Image Source setting. Click the drop down to see the available choices.
You can select Custom Image and a Twitter Image setting will be displayed where you can upload an image, select an image from your Media Library or paste the URL for an image.

IMPORTANT:
For the Summary card type, Twitter prefers images that are a minimum of 144 pixels wide by 144 pixels tall, with an aspect ratio of 1:1.
For the Summary with Large Image card type, Twitter prefers images that are a minimum of 300 pixels wide by 157 pixels tall, with an aspect ratio of 2:1.
Full details can be found in Twitter’s documentation here.
Setting the Twitter Card Type
Finally, we’re going to set the Card Type. This affects the appearance of the Tweet and can have a direct impact on click-throughs to your site.
You can use the drop down in the Twitter Card Type setting to choose either Summary or Summary with Large Image. The Preview will change based on your selection.

That’s all! You’ve now set the social meta that Twitter will use when your homepage is shared.
The post Configuring the Twitter Settings for Your Content first appeared on AIOSEO.]]>This information can significantly increase the click-through rates when people see your site on Facebook, leading to more visitors and greater engagement.
Luckily, All in One SEO makes it easy to control this information so you attract attention to your site when people scroll through their Facebook feed.
Here we'll show you how to set your Facebook Social Meta when your homepage is set to display your latest posts, and when your homepage is set to a static page.
NOTE:
If you're not sure whether your homepage is set to display your latest posts or a static page, just go to Settings » Reading on your site and check the Your homepage displays setting.
In This Article
Tutorial Video
Setting the Facebook Social Meta When Your Homepage Displays Your Latest Posts
To get started, click on Social Networks in the All in One SEO menu and then click on the Facebook tab.
On the Facebook screen, scroll down to the Home Page Settings section. You should see the Preview along with fields for Image, Title, Description and Object Type.
The Preview shows how your homepage will look in Facebook based on the image, title and description you set.

Now let's set an image in the Image field that will appear in Facebook when your homepage is shared.
To set your image, click on the Upload or Select Image button and upload an image, or choose an image from your Media Library.

You can also type or paste the URL for an image into the field.
The image you set will appear below the Image field and in the Preview.
IMPORTANT:
Facebook prefers images that are 1200 pixels wide by 630 pixels tall. The minimum dimensions they accept are 200 pixels by 200 pixels. Full details can be found in Facebook’s documentation here.
Next, let's set the title that will appear when your homepage is shared on Facebook.
Above the Title field you'll see some smart tags. Click on any tag to add it to the field.
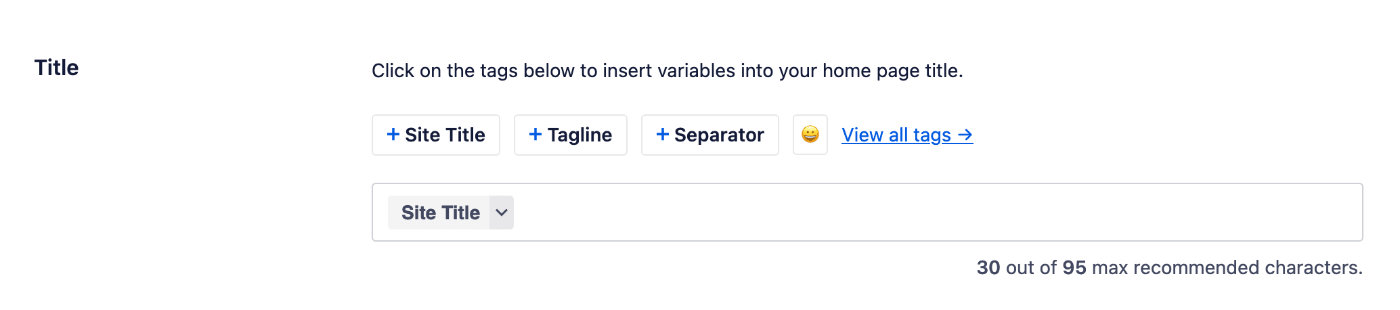
You can also type the hash character ( # ) in the field to display a list of available tags you can choose from.
You can also enter text in the Title field or combine text with the smart tags and there’s an emoji picker where you can add an emoji.
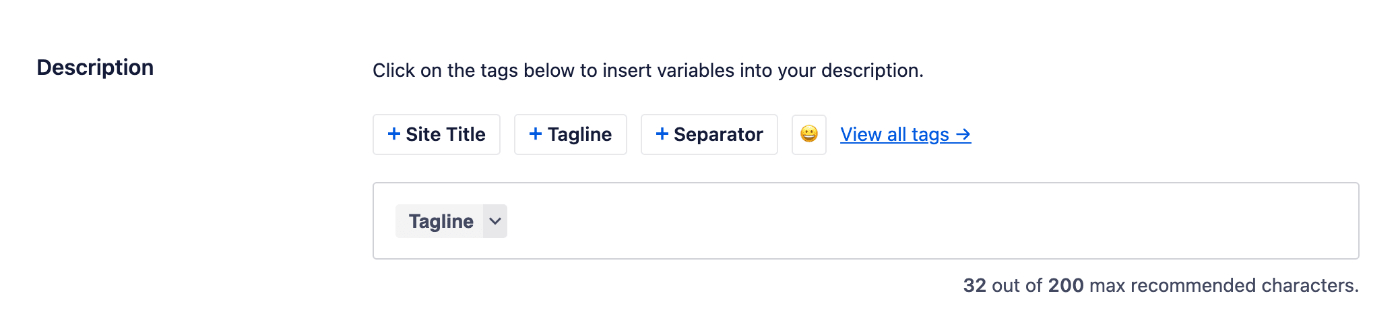
Now we can set the description.
The Description field works in the same way as the Title field. You can select from one of the smart tags displayed above the field, or type the hash character ( # ) in the field to display a list of available tags you can choose from.
You can also enter text in the field or combine text with smart tags and there’s an emoji picker where you can add an emoji.
Finally, we're going to set the Object Type. You're typically going to set this to Website because this best describes what the homepage is.
You can set this in the Object Type drop down.
Setting the Facebook Social Meta When Your Homepage Displays a Static Page
To set the Facebook Social Meta when your homepage displays a static page, go to Pages and click on your home page to edit it. Scroll down to the AIOSEO Settings section and click on the Social tab.
You should see the Facebook tab where you'll see the Facebook Preview, Facebook Title, Facebook Description, Image Source, Video URL and Object Type settings.
The Facebook Preview shows how your homepage should look when posted on Facebook based on the Title, Description and Image or Video you set. There are icons in the top right corner to view how it may look on desktop or mobile.
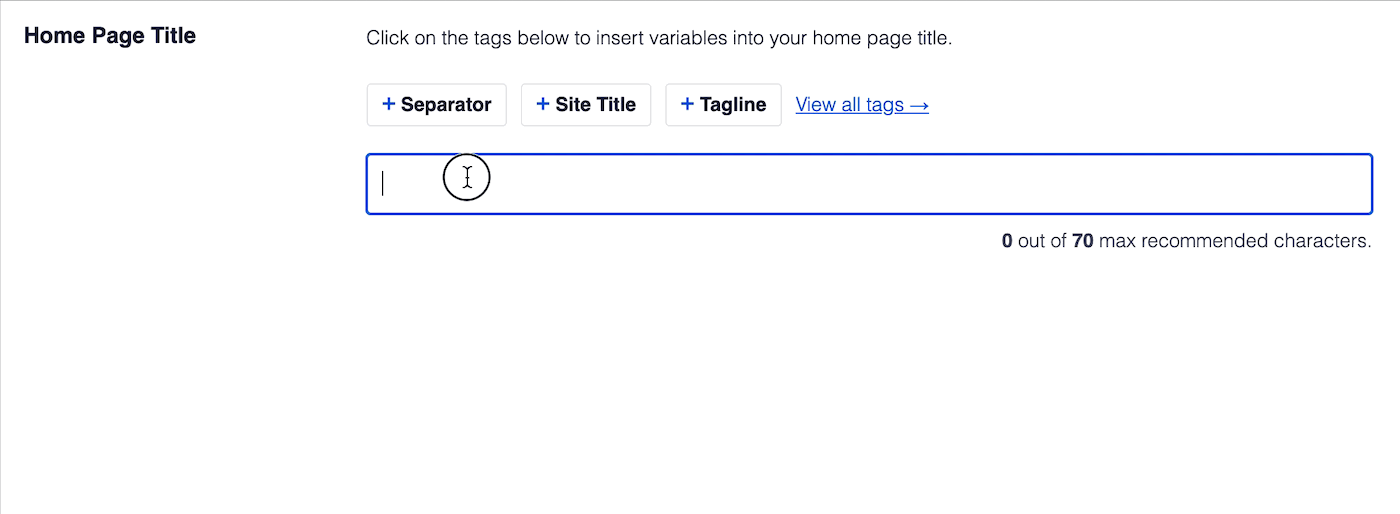
To set the title for your homepage, click on one of our smart tags shown above the Facebook Title field.
You can also type the hash character ( # ) in the field to display a list of available tags you can choose from.
You can also enter text in the Facebook Title field or combine text with the smart tags and there’s an emoji picker where you can add an emoji.
NOTE:
If you leave the Facebook Title field empty, then All in One SEO will automatically use the SEO Title entered in the General tab.
Now we can set the description for your homepage.
The Facebook Description field works in the same way as the Facebook Title field. You can select from one of the smart tags displayed above the field, or type the hash character ( # ) in the field to display a list of available tags you can choose from.
You can also enter text in the field or combine text with smart tags and there’s an emoji picker where you can add an emoji.
NOTE:
If you leave the Facebook Description field empty, then All in One SEO will automatically use the Meta Description entered in the General tab.
Next we're going to set the image.
You can do this using the Image Source setting. Click the drop down to see the available choices.
You can select Custom Image and a Facebook Image setting will be displayed where you can upload an image, select an image from your Media Library or paste the URL for an image.
IMPORTANT:
Facebook prefers images that are 1200 pixels wide by 630 pixels tall. The minimum dimensions they accept are 200 pixels by 200 pixels. Full details can be found in Facebook’s documentation here.
As an alternative to an image, you can also set a video. Just paste the URL for any video in the Video URL field.
Finally, we’re going to set the Object Type. You’re typically going to set this to Website because this best describes what the homepage is.
You can set this in the Object Type drop down.
That's all! You've now set the social meta that Facebook will use when your homepage is shared.
The post Setting Facebook Social Meta for Your Homepage first appeared on AIOSEO.]]>This information can significantly increase the click-through rates when people see your site on Twitter, leading to more visitors and greater engagement.
Luckily, All in One SEO makes it easy to control this information so you attract attention to your site when people scroll through their Twitter feed.
Here we'll show you how to set your Twitter Social Meta when your homepage is set to display your latest posts, and when your homepage is set to a static page.
In This Article
Tutorial Video
NOTE:
If you’re not sure whether your homepage is set to display your latest posts or a static page, just go to Settings » Reading on your site and check the Your homepage displays setting.
Setting the Twitter Social Meta When Your Homepage Displays Your Latest Posts
To get started, click on Social Networks in the All in One SEO menu and then click on the Twitter tab.
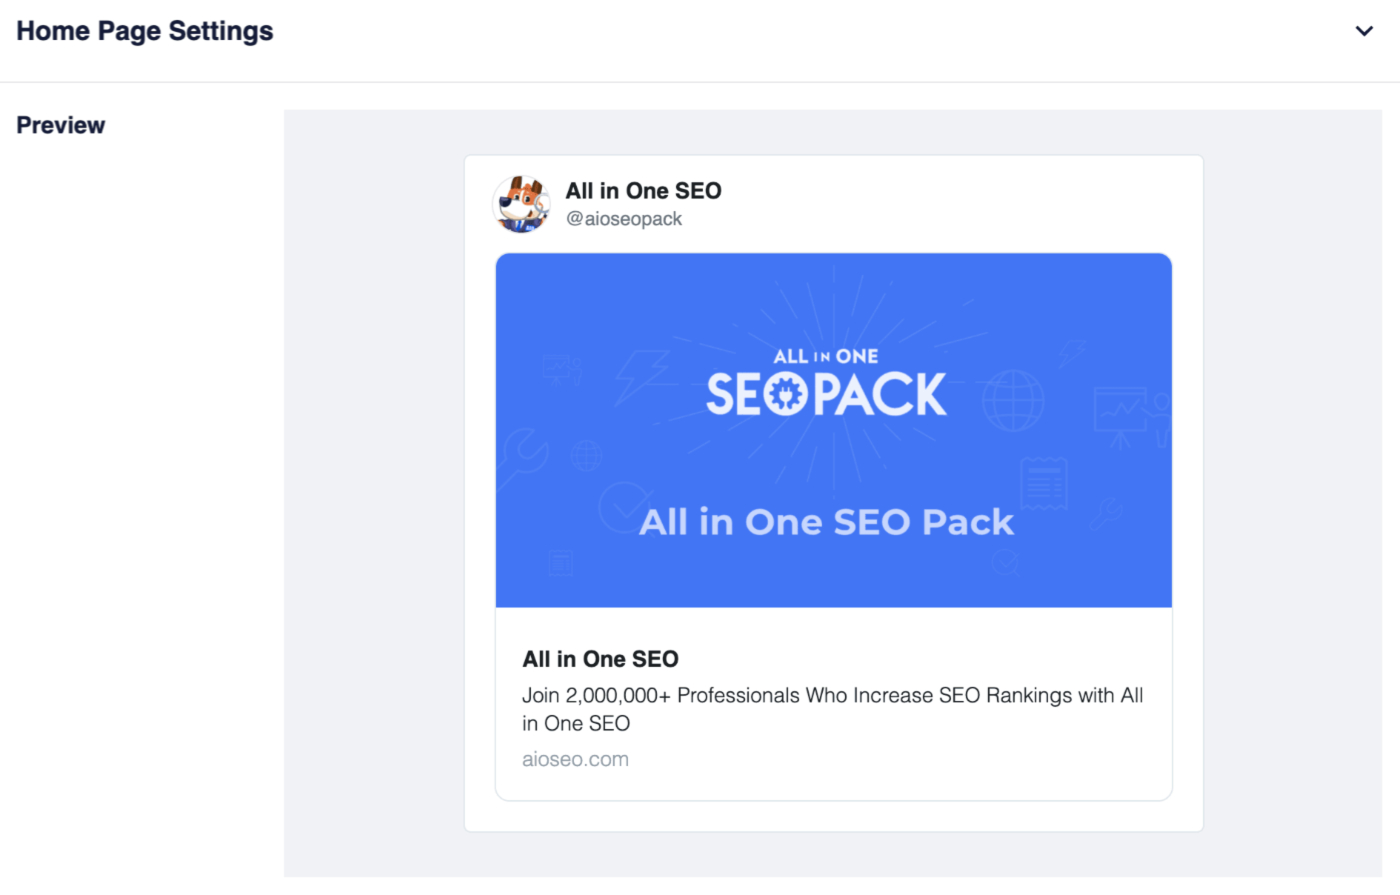
On the Twitter screen, scroll down to the Home Page Settings section. You should see the Preview along with fields for Card Type, Home Page Image, Home Page Title, and Description.
The Preview shows how your homepage will look in Twitter based on the image, title, description and card type you set.
Now let's set the Card Type. This affects the appearance of the Tweet and can have a direct impact on click-throughs to your site.
You can use the drop down in the Card Type setting to choose either Summary or Summary with Large Image. The Preview will change based on your selection.
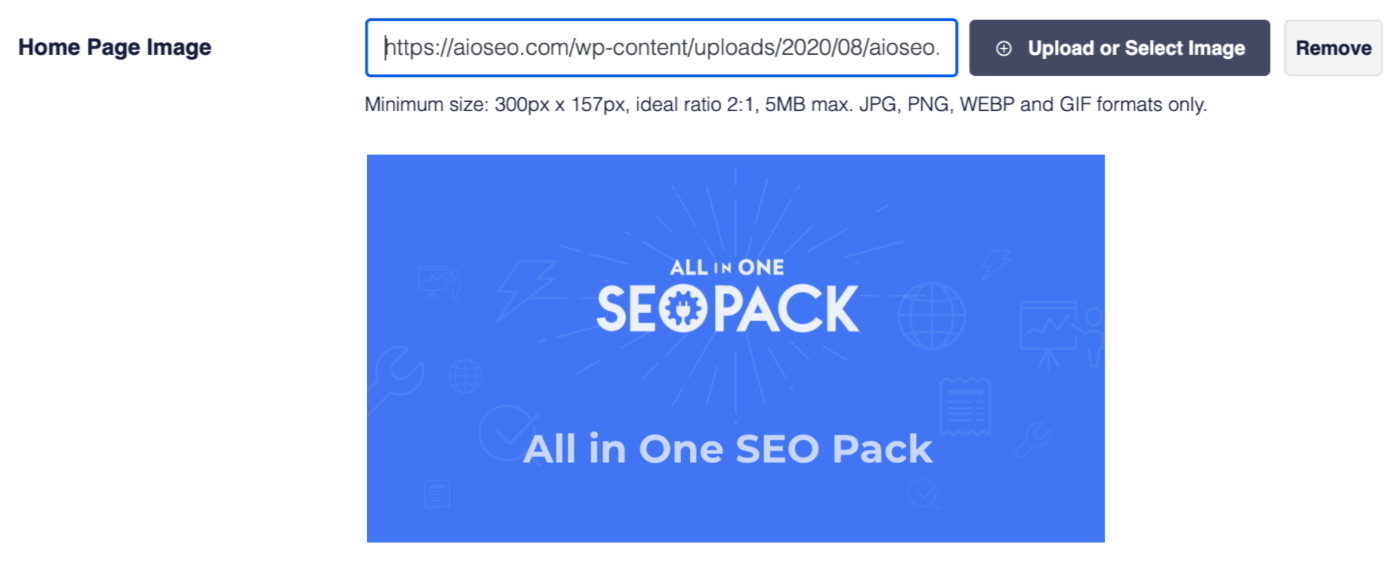
Next, let's set an image in the Home Page Image field that will appear in Twitter when your homepage is shared.
To set your image, click on the Upload or Select Image button and upload an image, or choose an image from your Media Library.

You can also type or paste the URL for an image into the field.
The image you set will appear below the Home Page Image field and in the Preview.
IMPORTANT:
For the Summary card type, Twitter prefers images that are a minimum of 144 pixels wide by 144 pixels tall, with an aspect ratio of 1:1.
For the Summary with Large Image card type, Twitter prefers images that are a minimum of 300 pixels wide by 157 pixels tall, with an aspect ratio of 2:1.
Full details can be found in Twitter’s documentation here.
Now that we've set the image, we can now set your title.
Above the Home Page Title field you'll see some smart tags. Click on any tag to add it to the field.
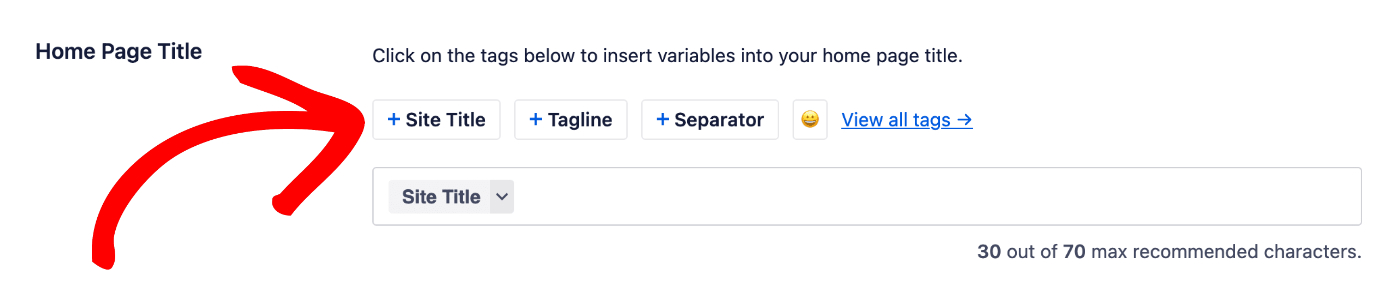
You can also type the hash character ( # ) in the field to display a list of available tags you can choose from.
You can also enter text in the field or combine text with smart tags and there’s an emoji picker where you can add an emoji.
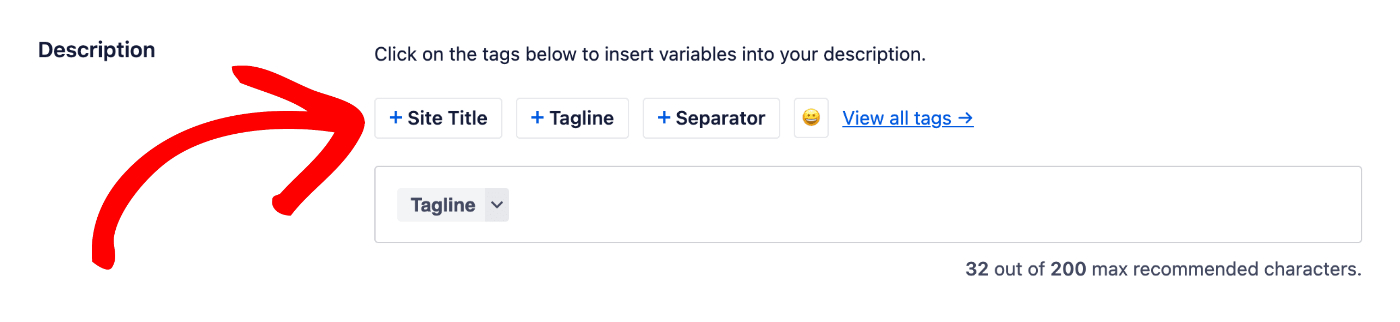
Now we can set the description.
The Description field works in the same way as the Home Page Title field. You can select from one of the smart tags displayed above the field, or type the hash character ( # ) in the field to display a list of available tags you can choose from.
You can also enter text in the field or combine text with smart tags and there’s an emoji picker where you can add an emoji.
Setting the Twitter Social Meta When Your Homepage Displays a Static Page
To set the Twitter Social Meta when your homepage displays a static page, go to Pages and click on your home page to edit it. Scroll down to the AIOSEO Settings section and click on the Social tab and then on the Twitter tab.
You should see the Twitter Preview, Use Data from Facebook Tab, Twitter Title, Twitter Description, Image Source and Twitter card Type settings.
The Twitter Preview shows how your homepage should look when posted on Twitter based on the Title, Description, Image and Card Type you set. There are icons in the top right corner to view how it may look on desktop or mobile.
If you want to use the Title, Description and Image set on the Facebook tab as the Twitter title, description and image, then enable the Use Data from Facebook Tab setting.
To set the title for your homepage, click on one of our smart tags shown above the Twitter Title field.
You can also type the hash character ( # ) in the field to display a list of available tags you can choose from.
You can also enter text in the Twitter Title field or combine text with the smart tags and there’s an emoji picker where you can add an emoji.
NOTE:
If you leave the Twitter Title field empty, then All in One SEO will automatically use the Facebook Title if set, or the SEO Title entered in the General tab.
Now we can set the description for your homepage.
The Twitter Description field works in the same way as the Twitter Title field. You can select from one of the smart tags displayed above the field, or type the hash character ( # ) in the field to display a list of available tags you can choose from.
NOTE:
If you leave the Twitter Description field empty, then All in One SEO will automatically use the Facebook Description if set, or the Meta Description entered in the General tab.
Next we’re going to set the image.
You can do this using the Image Source setting. Click the drop down to see the available choices.
You can select Custom Image and a Twitter Image setting will be displayed where you can upload an image, select an image from your Media Library or paste the URL for an image.
IMPORTANT:
For the Summary card type, Twitter prefers images that are a minimum of 144 pixels wide by 144 pixels tall, with an aspect ratio of 1:1.
For the Summary with Large Image card type, Twitter prefers images that are a minimum of 300 pixels wide by 157 pixels tall, with an aspect ratio of 2:1.
Full details can be found in Twitter’s documentation here.
Finally, we're going to set the Card Type. This affects the appearance of the Tweet and can have a direct impact on click-throughs to your site.
You can use the drop down in the Twitter Card Type setting to choose either Summary or Summary with Large Image. The Preview will change based on your selection.
That's all! You've now set the social meta that Twitter will use when your homepage is shared.
The post Setting Twitter Social Meta for Your Homepage first appeared on AIOSEO.]]>Here we'll discuss what the Knowledge Panel is and how to get your social media profiles displayed in it.
In This Article
Tutorial Video
What is the Knowledge Panel?
The Knowledge Panel is a generic term for a panel that may appear in the right sidebar of search results. It typically contains some rich information relevant to your search term.
Here's three examples of a Knowledge Panel which appear in Google, Bing and Yandex.

Notice all the rich information shown in the Knowledge Panel examples above. This information comes from a variety of sources.
Here we'll focus on just the social media links you see in two of the examples above.
IMPORTANT:
Search engines don't have to display information you provide. They decide on a per search basis what to display and where to get the information from.
Adding Your Social Media Profiles in All in One SEO
The first step in adding your social media profiles is to go to Social Networks in the All in One SEO menu.
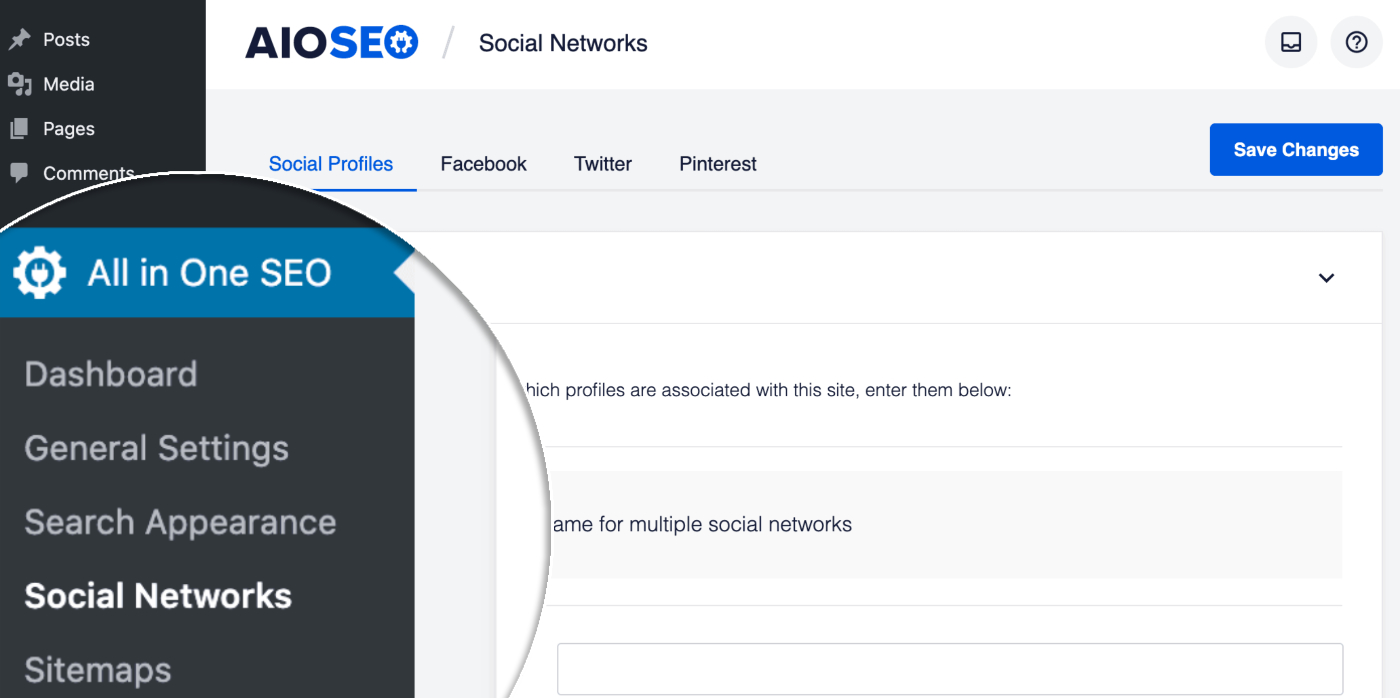
You'll now see the Social Profiles screen where you can enter the URLs for your social media profiles. These will be used site-wide for all content authors.
You'll see fields for all of the most popular social media networks.
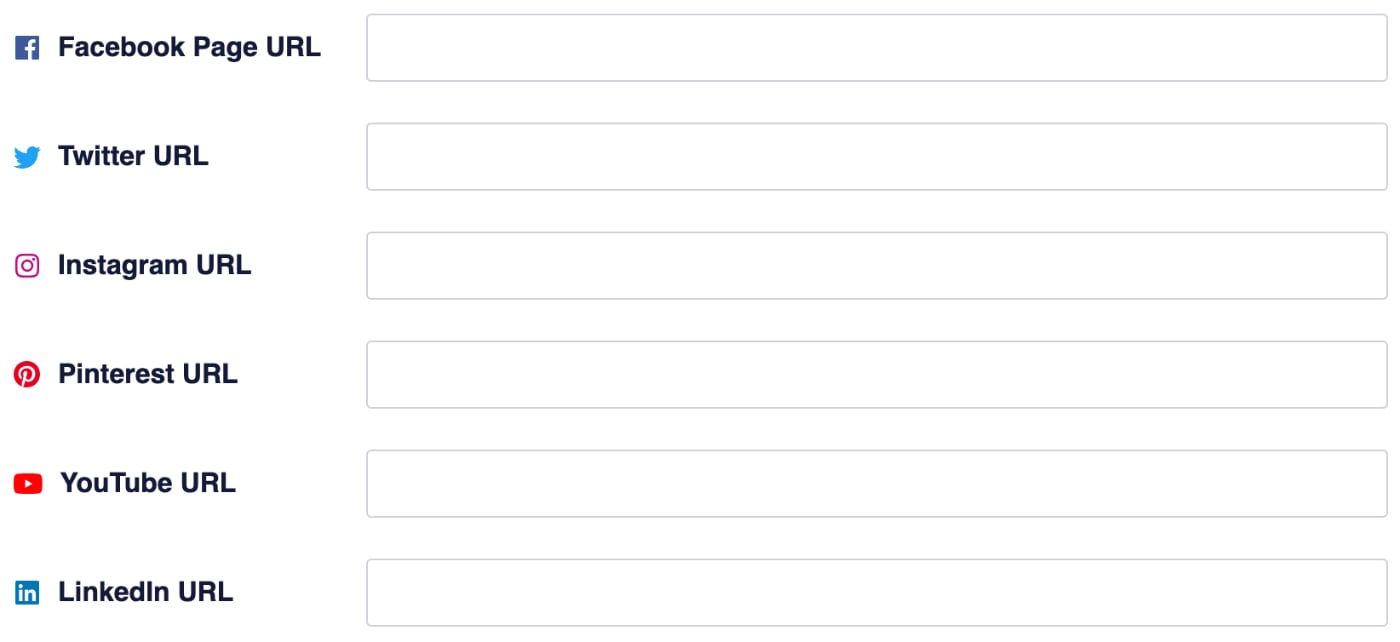
Enter the full URL for your social media profile in each field as shown below.

If you use the same profile name for multiple social media networks, then All in One SEO can save you time.
To do this, enable the Use the same username for multiple social networks setting by checking the checkbox.

Once you enable the Use the same username for multiple social networks setting you'll see a Your Username field.
Enter your profile name in the Your Username field and select the checkboxes for the social media networks you use this profile name for.

All in One SEO will then fill in the social profile URL fields with your profile for you.
Adding Social Media Profiles For Each Content Author
Tutorial Video
Check out the video below on how to add social media profiles to each user:
You can also add the social media profiles for each author on your site.
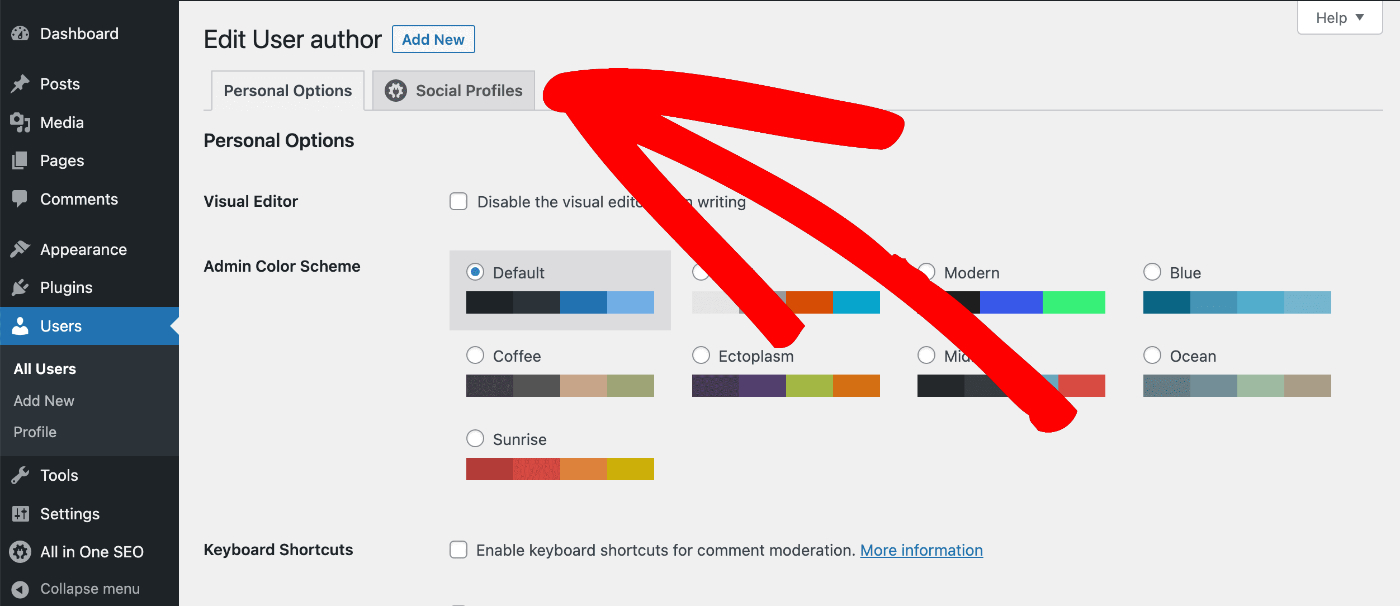
To do this, go to Users in the WordPress menu and edit any user. Then click on the Social Profiles tab at the top of the Edit User screen.
You'll now see the Social Profiles screen where you can enter the URLs for your social media profiles for this user.
You'll see fields for all of the most popular social media networks.
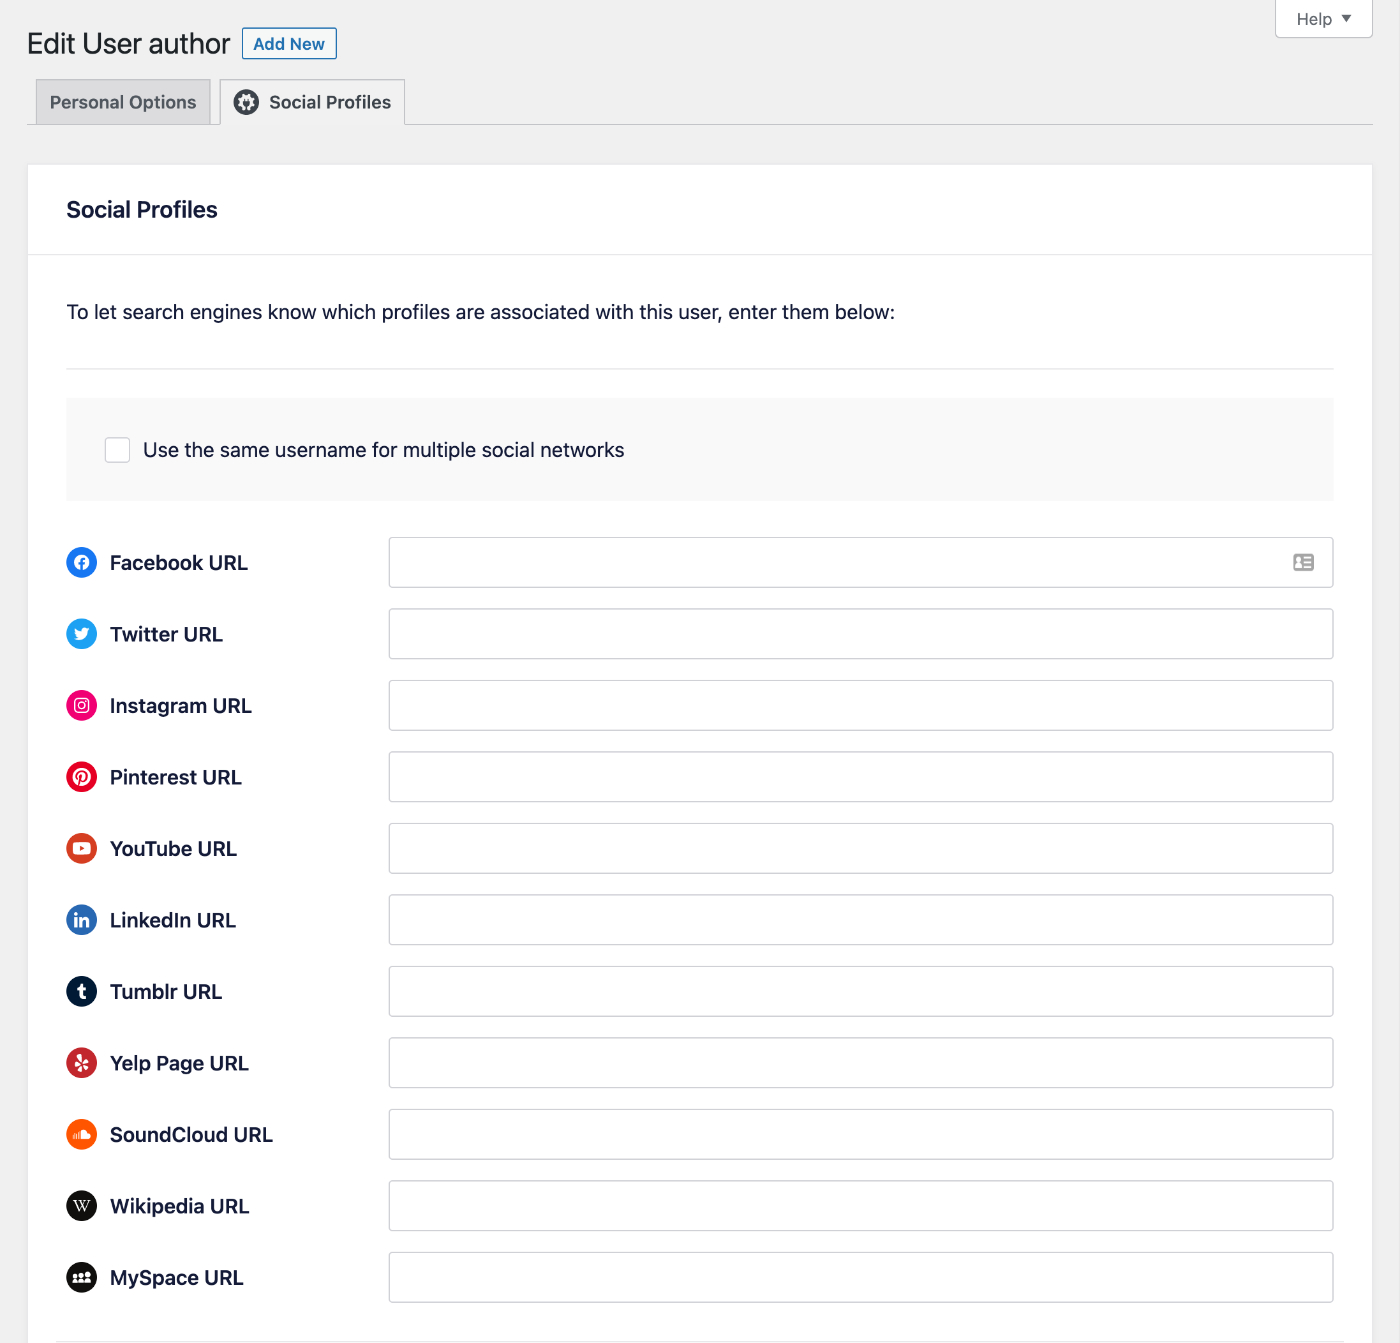
Enter the full URL for your social media profile in each field as shown below.

If you use the same profile name for multiple social media networks, then All in One SEO can save you time.
To do this, enable the Use the same username for multiple social networks setting by checking the checkbox.
Once you enable the Use the same username for multiple social networks setting you'll see a Your Username field.
Enter your profile name in the Your Username field and select the checkboxes for the social media networks you use this profile name for.
All in One SEO will then fill in the social profile URL fields with your profile for you.
Adding Additional Social Media Profiles
Do you have any additional social media profiles you'd like to enter that aren't included in our list of default social media networks?

You can add these in the Additional Profiles box at the bottom of the page. Any social media URL you enter will be automatically included in our Knowledge Panel schema.
Common examples of additional social media platforms our users want to include are:
- TikTok
- Telegram
- Snapchat
- Vkontakte (VK)
- Seina Weibo
- Tencent QQ
- Kuaishou
That's all! You've now added your social media profiles in All in One SEO which search engines may use when displaying the Knowledge Panel in search results.
The post Displaying Your Social Media Profiles in Knowledge Panel first appeared on AIOSEO.]]>To get started, click on Social Networks in the All in One SEO menu and then click on the Facebook tab.
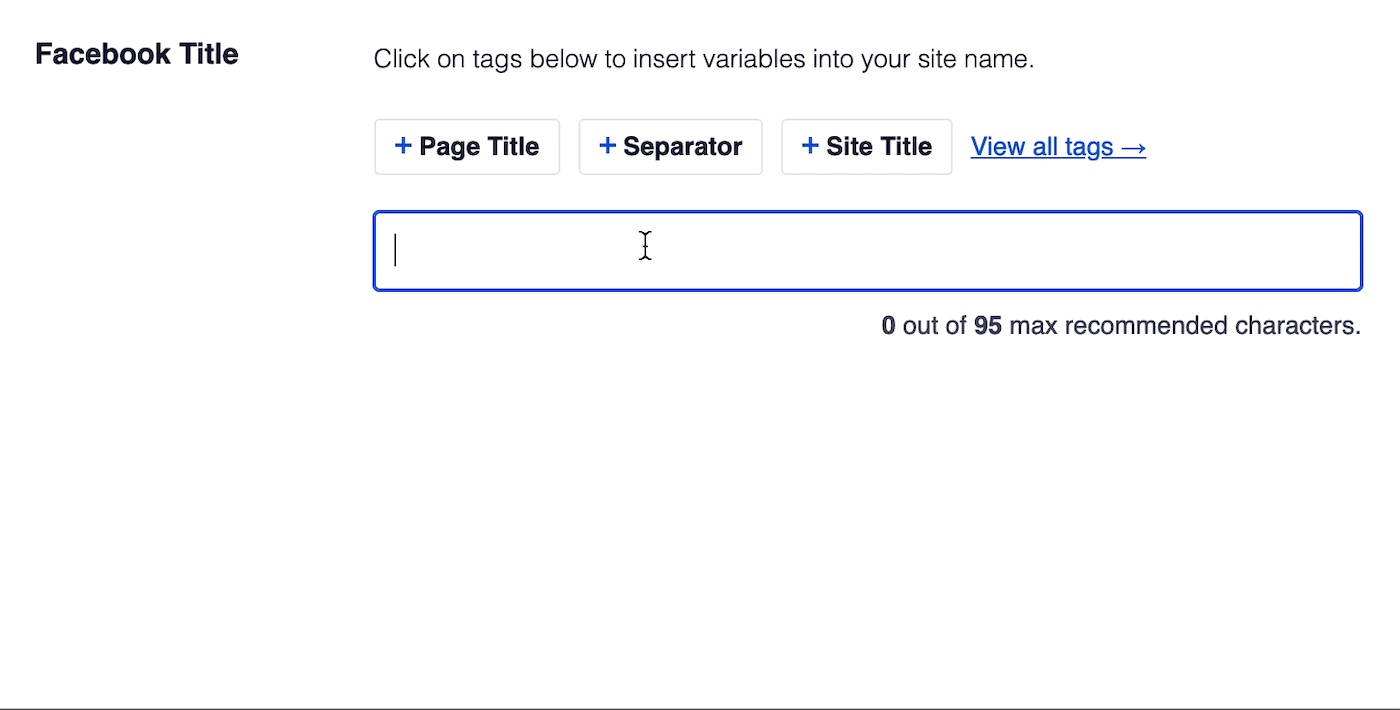
On the Facebook screen, scroll down until you see the Site Name field.
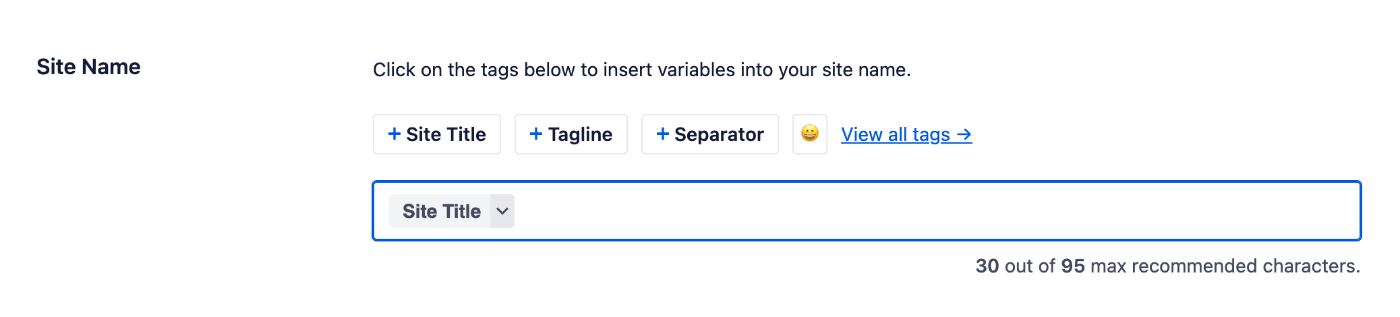
Above the Site Name field you'll see some smart tags. Click on any tag to add it to the field.
You can also type the hash character ( # ) in the field to display a list of available tags you can choose from.
You can also enter text in the Site Name field or combine text with the smart tags and there’s an emoji picker where you can add an emoji.
The post Setting the Site Name for Facebook first appeared on AIOSEO.]]>Luckily, it's really easy to set the Twitter card type with All in One SEO.
In This Article
Setting the Default Twitter Card Type
To set the default card type for your content, click on Social Networks in the All in One SEO menu and then click on the Twitter tab.
In the Twitter Card Settings you should see the Default Card Type setting.
You can use the drop down in the Default Card Type setting to choose either Summary or Summary with Large Image.
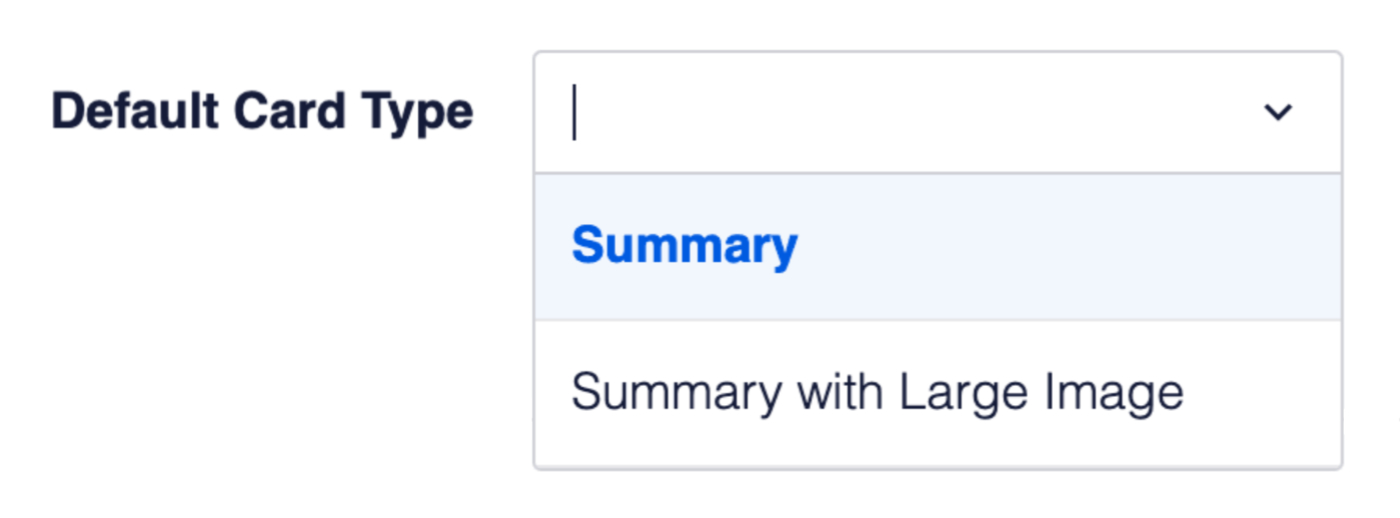
Summary Card Type
The Summary card type will display a title, description and thumbnail image.

Summary With Large Image Card Type
The Summary with Large Image card type will display a title, description and large image.