But to truly stand out and reach a wider audience, you have to ensure your Web Stories are optimized for search engines. That’s where All in One SEO comes in.
With our intuitive, user-friendly interface, you can easily optimize your Web Stories for maximum visibility—boosting your SEO, driving more visitors, and ensuring your content gets the attention it deserves—all with just a few simple clicks.
In This Article
IMPORTANT:
While it's possible to automatically generate your SEO titles and descriptions, this can lead to poor-quality titles and descriptions which will be ignored by search engines. The best titles and descriptions are ones you write yourself.
Tutorial Video
Controlling SEO for Web Stories
NOTE:
Before proceeding, you'll need to have the Web Stories WordPress plugin from Google installed and configured.
To get started, click on Search Appearance in the All in One SEO menu and then click on the Content Types tab.
Scroll down and you should see a section called Stories. This content type is generated by the Web Stories WordPress plugin from Google.

The Preview shows an example of how your content may look in search results based on the Story Title and Meta Description formats you set.
NOTE:
These settings will be hidden if Show in Search Results is set to No. This is because you've chosen to not have your Web Stories to appear on search engines. Change Show in Search Results to Yes if you want this content to appear in search engines.
Setting the Title Formats
To set the title format that will be used to automatically generate titles for your stories, click on one of our smart tags shown above the Story Title field.

You can also enter text in the Title field. There’s also an emoji picker where you can add an emoji.
You can type the hash character ( # ) in the field to display a list of available tags you can choose from.
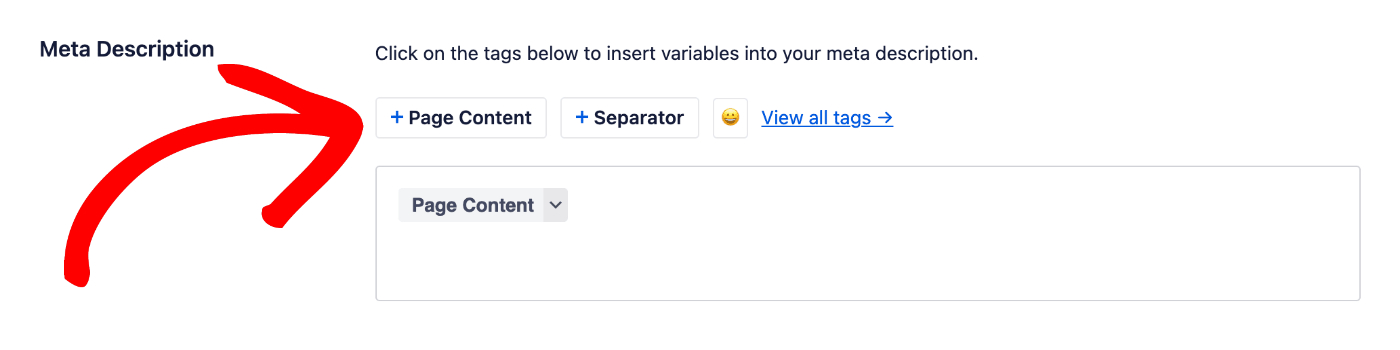
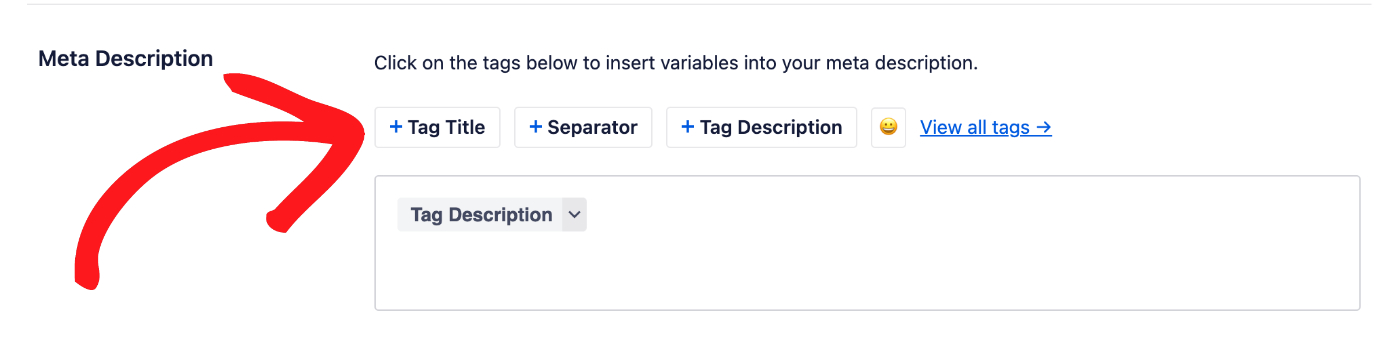
Setting the Meta Description Format
You can set the format that will be used to automatically generate meta descriptions for your web stories by using the Meta Description field.
This field works in the same way as the Story Title field. You can select from one of the smart tags displayed above the field, or type the hash character ( # ) in the field to display a list of available tags you can choose from.

NOTE:
All in One SEO will output the AmpStory schema for Web Stories automatically.
Save your changes, and that's it! Your Web Stories will be ready to be found by search engines!
The post How to Optimize Your Web Stories with All in One SEO first appeared on AIOSEO.]]>BuddyPress adds powerful social networking features to WordPress, allowing users to create profiles, interact in activity streams, join groups, and much more.
When paired with All in One SEO, you can enhance the visibility of your BuddyPress groups and make sure they appear on search engines, making it easier for people to find and engage with your communities.
This guide will show you how to integrate AIOSEO with BuddyPress to improve your groups' SEO and make your community stand out online.
In This Article
IMPORTANT:
While it's possible to automatically generate your SEO titles and descriptions, this can lead to poor quality titles and descriptions which will be ignored by search engines. The best titles and descriptions are ones you write yourself.
Tutorial Video
Controlling SEO for BuddyPress Activities
To get started, click on Search Appearance in the All in One SEO menu and then click on the Content Types tab.
Scroll down and you should see a section called Activities (BuddyPress).

The Preview shows an example of how your content may look in search results based on the Activity Title and Meta Description formats you set.
NOTE:
These settings will be hidden if Show in Search Results is set to No. This is because you've chosen to not have this content appear on search engines. Change Show in Search Results to Yes if you want this content to appear in search engines.
Setting the Title Formats
To set the title format that will be used to automatically generate titles for your activities, click on one of our smart tags shown above the Title field.

You can also enter text in the Title field or combine text with the smart tags and there’s an emoji picker where you can add an emoji.
You can also type the hash character ( # ) in the field to display a list of available tags you can choose from.
Setting the Description Format
You can set the format that will be used to automatically generate meta descriptions for your activities by using the Meta Description field.
This field works in the same way as the Title field. You can select from one of the smart tags displayed above the field, or type the hash character ( # ) in the field to display a list of available tags you can choose from.

NOTE:
All in One SEO will output the DiscussionForumPosting schema for BuddyPress Activities automatically.
Controlling SEO for BuddyPress Groups
The Search Appearance settings will appear the same for BuddyPress Groups:

Setting the Title Formats
Like with the Activities, the format specified in the Group Title field will be used to automatically generate titles for your groups. To do this, click on one of our smart tags shown above the Title field.

Setting the Description Format
You can set the format that will be used to generate meta descriptions for your activities by using the Meta Description field.

Controlling SEO for BuddyPress Members
Lastly, Search Appearance settings will appear as below for BuddyPress Members:

The fields are similar to those in the BuddyPress Activities and Groups.
Setting the Description Format
For Members (BuddyPress), however, the Meta Description can also be used as a field to enter the author biography, achievements, or titles within the group.

When you're done, save your changes and the SEO for your BuddyPress Groups, Activities, and Members will be ready for search engines to find!
The post Manage your BuddyPress Groups’ SEO with All in One SEO first appeared on AIOSEO.]]>Here, we’ll show you how to use All in One SEO to enhance your variable products—those items with different attributes such as sizes, colors, etc.
In This Article
IMPORTANT:
Whilst it's possible to automatically generate your SEO titles and descriptions, this can lead to poor quality titles and descriptions which will be ignored by search engines. The best titles and descriptions are ones you write yourself.
Tutorial Video
What is a Product Attribute?
Before diving in, let’s break down an important concept: product attributes.
In WooCommerce, product attributes are the different variations for a product.
A good example is t-shirts.
These can have product attributes for Color with values like Red, Blue, and Green. They can also have product attributes for Size with values like Small, Medium, and Large.
These attributes can be combined into product variations such as small green t-shirt, medium green t-shirt, small blue t-shirt, medium blue t-shirt.
Customers select exactly the variation they want to purchase, and search engines will understand the specifics of your product.
When you want to create a variable product in WooCommerce, you first create the product attributes and then use these to create the product variations.
For more details on WooCommerce product attributes and variable products, check out the links to their documentation below:
For the purposes of how this content is treated by WordPress and All in One SEO, a product attribute is a taxonomy, just like product categories and tags.
Now that we have the basics, we can look at how to control the SEO for your product attributes.
Controlling SEO for Product Attributes
To get started, click on Search Appearance in the All in One SEO menu and then click on the Taxonomies tab.
Scroll down and you should see sections for each of your taxonomies. If you have added any product attributes in WooCommerce, then you'll see a section for Product Attributes.

NOTE:
These settings will be hidden if Show in Search Results is set to No. This is because you've chosen to not have this content appear on search engines. Change Show in Search Results to Yes if you want this content to appear in search engines.
The Preview shows an example of how your content may look in search results based on the Title and Meta Description formats you set.
Setting the SEO Title Format
To set the SEO title format that will be used to automatically generate SEO titles for your content, click on one of our smart tags shown above the Title field.

You can also type the hash character ( # ) in the field to display a list of available tags you can choose from.

You can also enter text in the Title field or combine text with the smart tags, and there’s an emoji picker where you can add an emoji.
Whatever you set in the Title will apply to all your Product Attributes. However, you can override this by going to Products > Attributes in WooCommerce and clicking on the Attribute to see a list of the Attribute Terms.
You can then click on the Attribute Term and scroll down to the AIOSEO Settings section, where you'll see a Title field shown below.

NOTE:
Setting the SEO Title for individual Product Attributes is available to customers with a Basic plan or above for All in One SEO Pro.
Upgrade to All in One SEO Pro today to get this feature and many more!
Setting the SEO Description Format
You can set the SEO description format that will be used to automatically generate SEO descriptions for your content by using the Meta Description field.
This field works in the same way as the Title field. You can select from one of the smart tags displayed above the field, or type the hash character ( # ) in the field to display a list of available tags you can choose from.

You can also enter text in the field or combine text with smart tags and there’s an emoji picker where you can add an emoji.
Whatever you set in the Meta Description will apply to all your Product Attributes. However, you can override this by going to Products > Attributes in WooCommerce and clicking on the Attribute to see a list of the Attribute Terms.
You can then click on the Attribute Term and scroll down to the AIOSEO Settings section, where you'll see a Meta Description field shown below.
NOTE:
Setting the Meta Description for individual Product Attributes is available to customers with a Basic plan or above for All in One SEO Pro.
Upgrade to All in One SEO Pro today to get this feature and many more!
That’s all! You’ve now set the SEO title and description formats for your WooCommerce Product Attributes.
The post Setting the SEO for WooCommerce Product Attributes first appeared on AIOSEO.]]>This is important because search engines such as Google want you to include your brand name or business name in your SEO titles and distinguish this from your page title or post title with a separator.
Below is an example of how this looks in Google search results:

Notice how the Microsoft Office result uses a vertical line ( | ) as the separator and the Wikipedia result uses a dash or hyphen ( – ) as the separator.
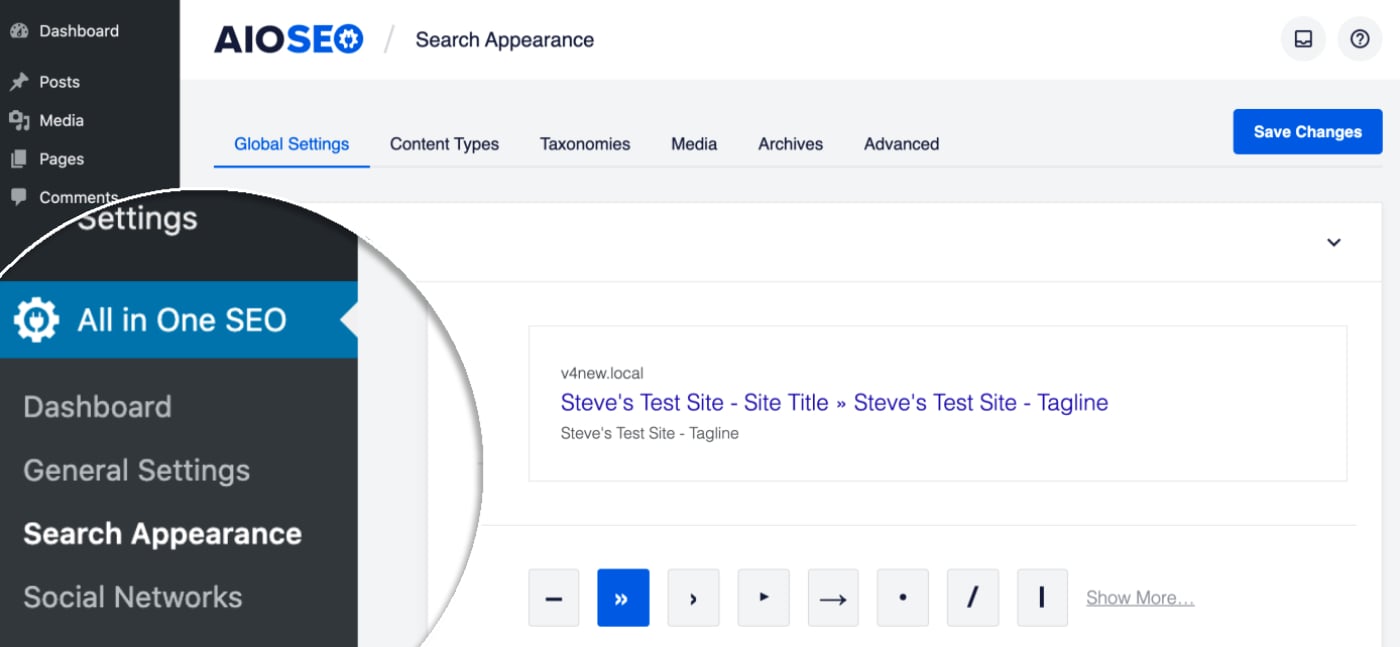
To set which character is used for your site, go to Search Appearance in the All in One SEO menu.
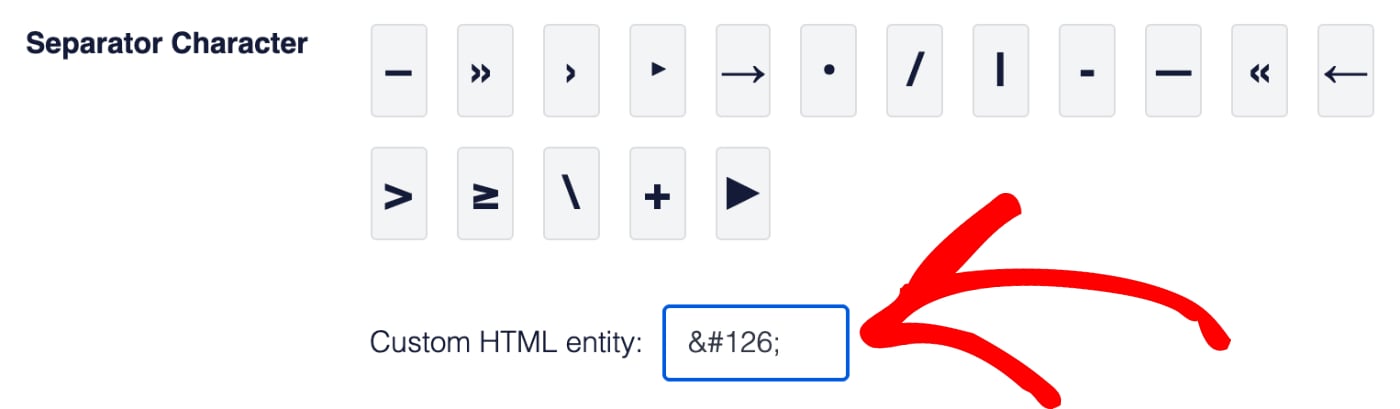
You'll see the Title Separator settings. Here you can click on one of the available characters to choose it.

The character you choose will be shown in the Preview so you can see how this will look in search results.

You can also enter an HTML character code in the Custom HTML entity field to set your own custom separator character.
Congratulations! You've now set a separator character which will be used throughout the plugin wherever you see the word “Separator“.
The post Setting a Title Separator first appeared on AIOSEO.]]>If you are, then this article will help you with easy-to-follow steps for the following:
In This Article
Tutorial Video
Checking Your Home Page Display Settings
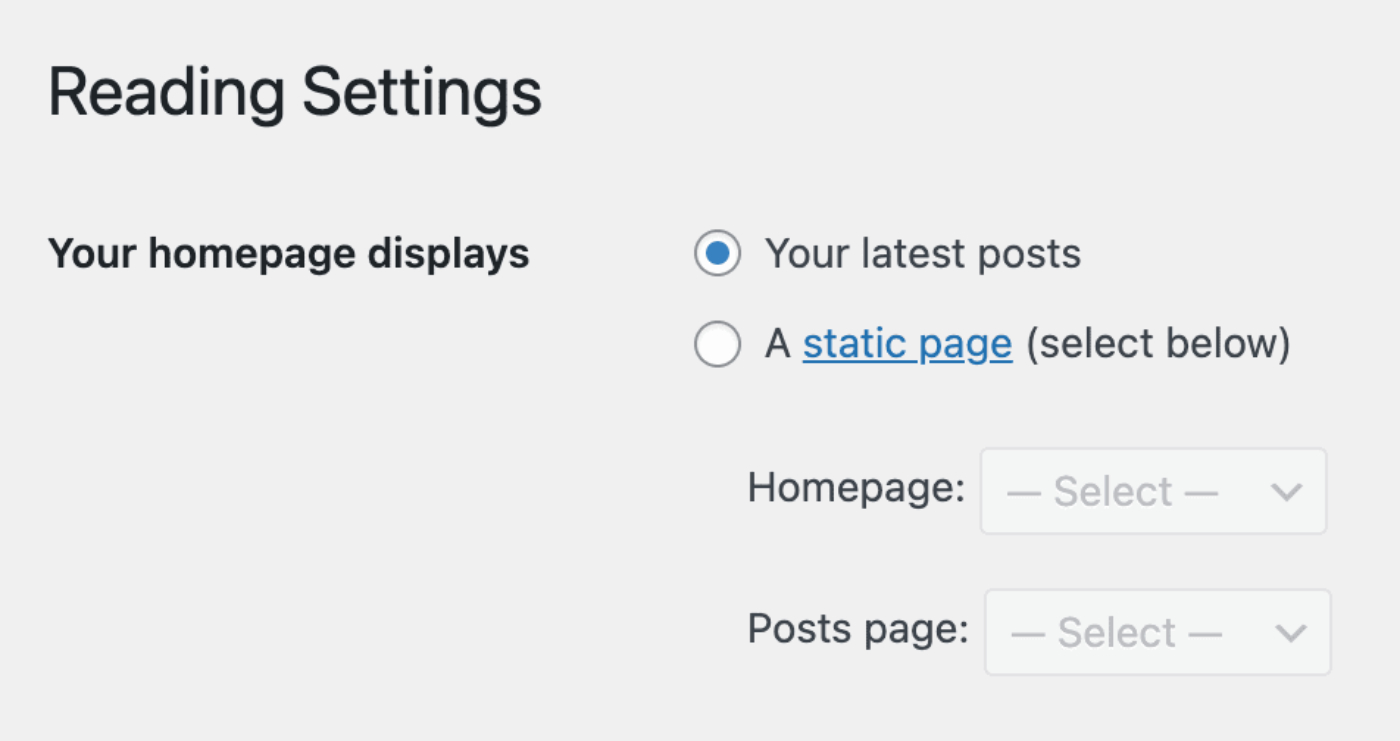
Before we begin, you'll need to know if your homepage is set to display your latest posts or a static page.
You can check this by going to Settings » Reading on your site and checking the Your homepage displays setting.
Setting the SEO When Your Homepage Displays Your Latest Posts
To set the SEO when your homepage displays your latest posts, click on Search Appearance in the All in One SEO menu.
You should see the Home Page Settings section where you'll see the Preview, Home Title, and Meta Description.
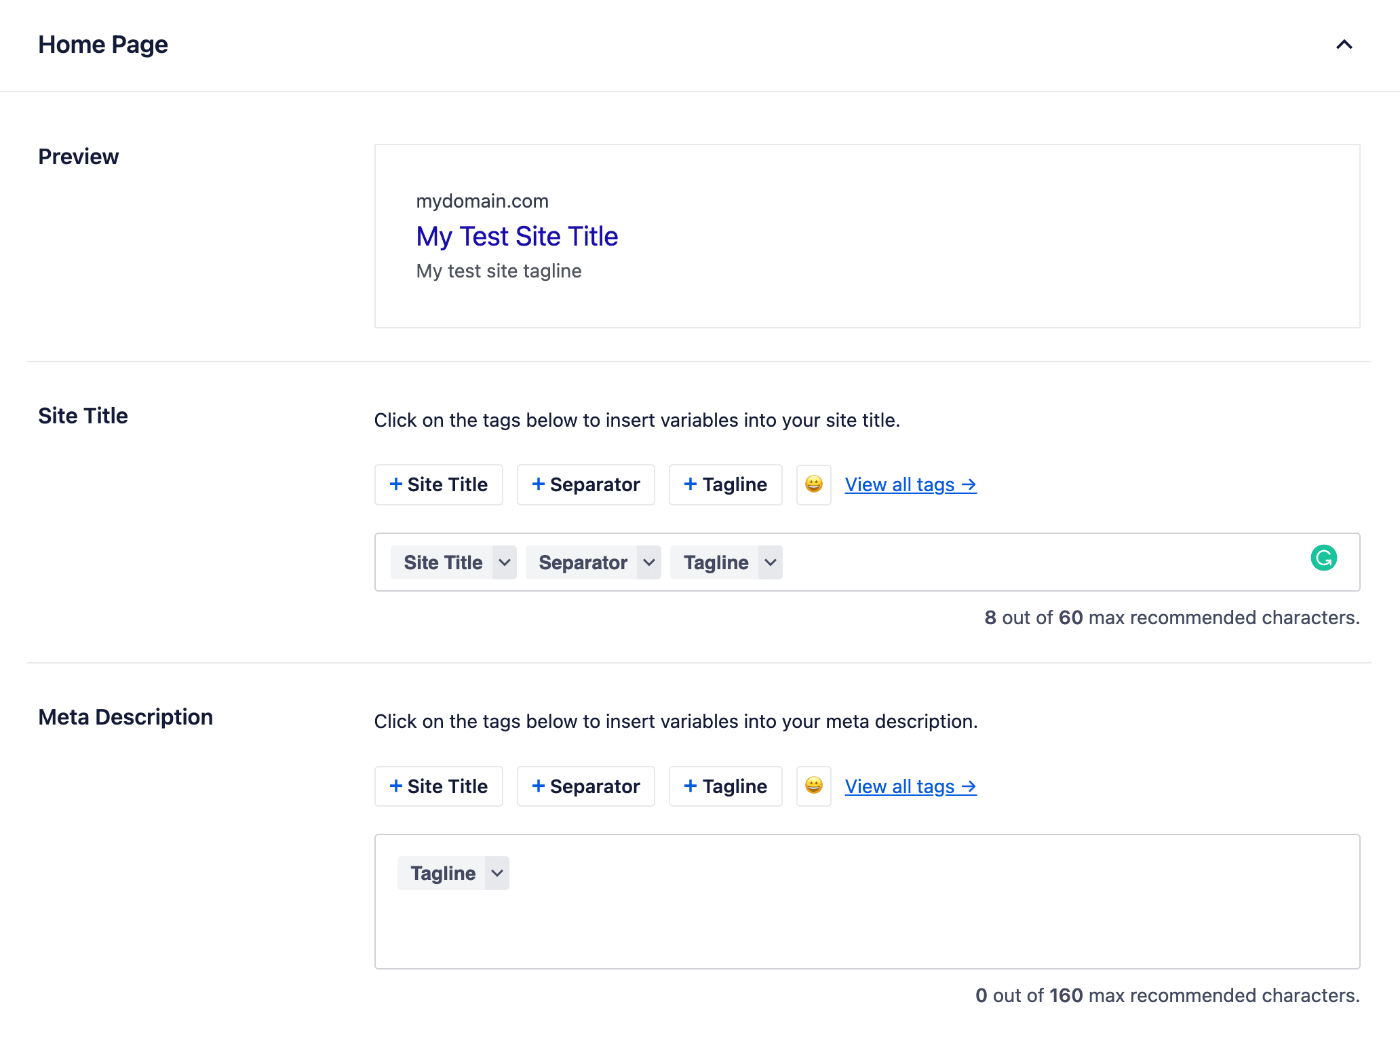
The Preview shows how your homepage may look in search results based on the Home Title and Meta Description you set.

To set the SEO title for your homepage, click on one of our smart tags shown above the Home Title field.
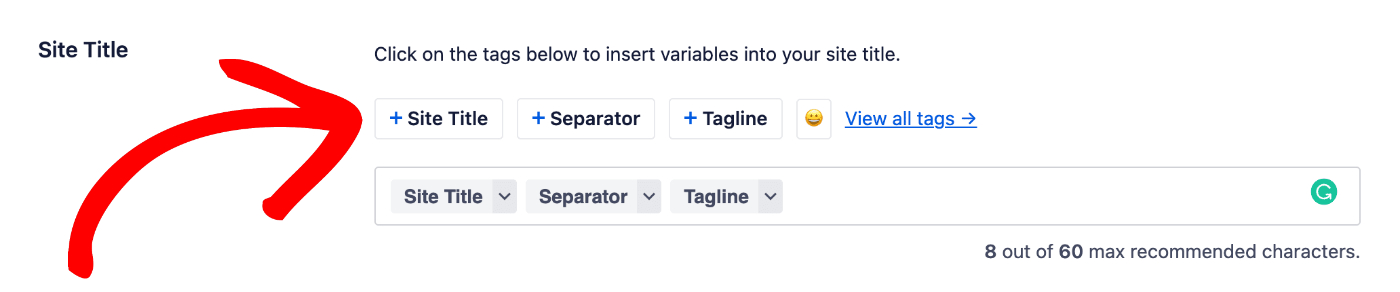
You can also type the hash character ( # ) in the field to display a list of available tags you can choose from.
You can also enter text in the Home Title field or combine text with the smart tags and there's an emoji picker where you can add an emoji.
Now we can set the SEO description for your homepage.
The Meta Description field works in the same way as the Home Title field. You can select from one of the smart tags displayed above the field, or type the hash character ( # ) in the field to display a list of available tags you can choose from.
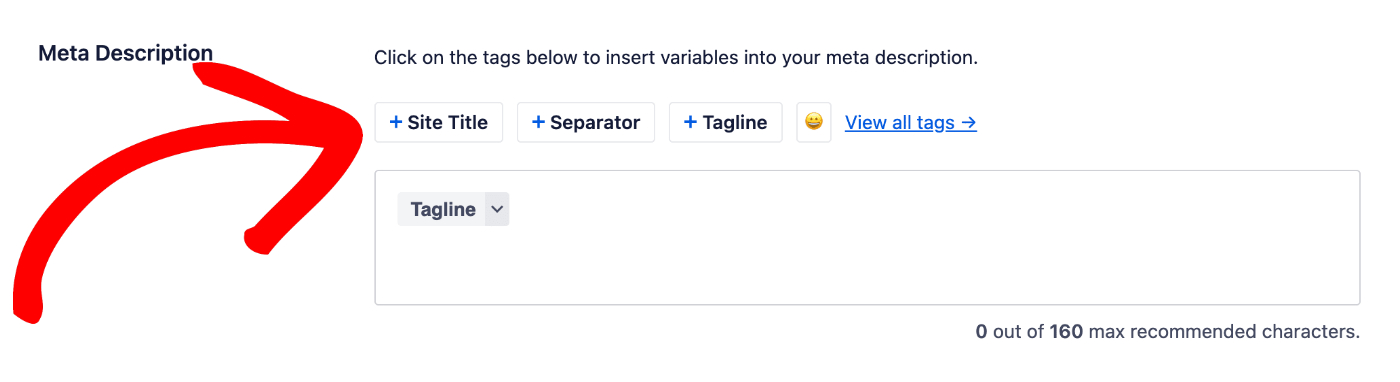
You can also enter text in the field or combine text with smart tags and there's an emoji picker where you can add an emoji.
If you have enabled Meta Keywords for the Russian search engine Yandex, you'll see a Keywords field where you can enter your meta keywords.

That’s all! You’ve now set the SEO meta for your homepage.
Setting the SEO When Your Homepage Displays a Static Page
To set the SEO when your homepage displays a static page, edit your home page and scroll down to the AIOSEO Settings section.
Here you'll see the SERP Preview, Page Title and Meta Description.
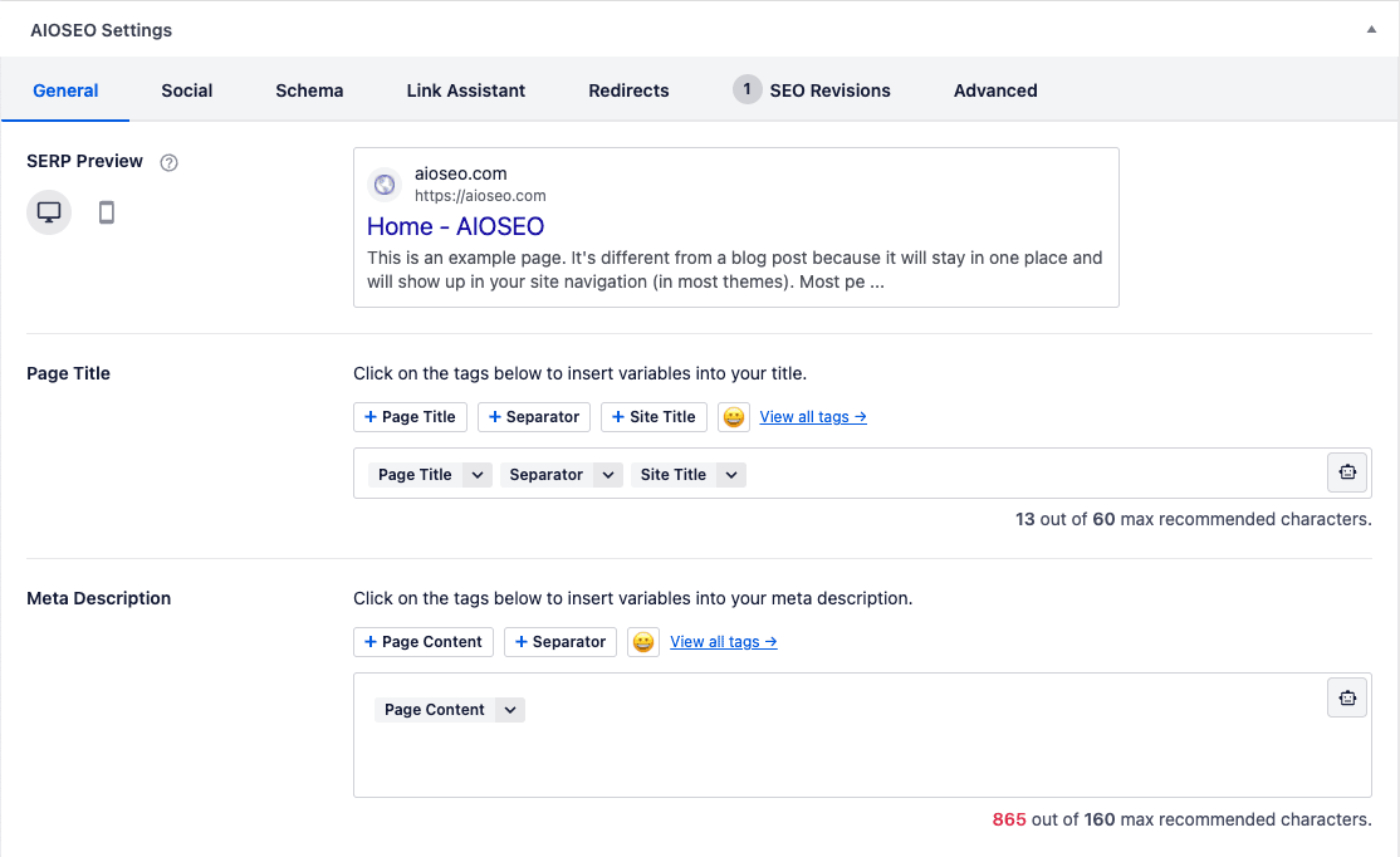
The SERP Preview shows how your homepage may look in search results based on the Page Title and Meta Description you set. There are icons in the top right corner to view how the search results may look on desktop or mobile.

To set the SEO title for your homepage, click on one of our smart tags shown above the Page Title field.

You can also type the hash character ( # ) in the field to display a list of available tags you can choose from.
You can also enter text in the Page Title field or combine text with the smart tags and there's an emoji picker where you can add an emoji.
Now we can set the SEO description for your homepage.
The Meta Description field works in the same way as the Page Title field. You can select from one of the smart tags displayed above the field, or type the hash character ( # ) in the field to display a list of available tags you can choose from.
You can also enter text in the field or combine text with smart tags and there's an emoji picker where you can add an emoji.
If you have enabled Meta Keywords for the Russian search engine Yandex, click on the Advanced tab and you'll see a Keywords field where you can enter your meta keywords.

That’s all! You’ve now set the SEO meta for your homepage.
The post Setting the SEO for Your Home Page first appeared on AIOSEO.]]>This can be a huge timesaver if you have lots of pages.
Here we'll help you with easy-to-follow steps to automatically generate SEO titles and descriptions based on formats you can create.
In This Article
Tutorial Video
IMPORTANT:
Whilst it's possible to automatically generate your SEO titles and descriptions, this can lead to poor quality titles and descriptions which will be ignored by search engines. The best titles and descriptions are ones you write yourself.
Controlling SEO for Pages
To get started, click on Search Appearance in the All in One SEO menu and then click on the Content Types tab.
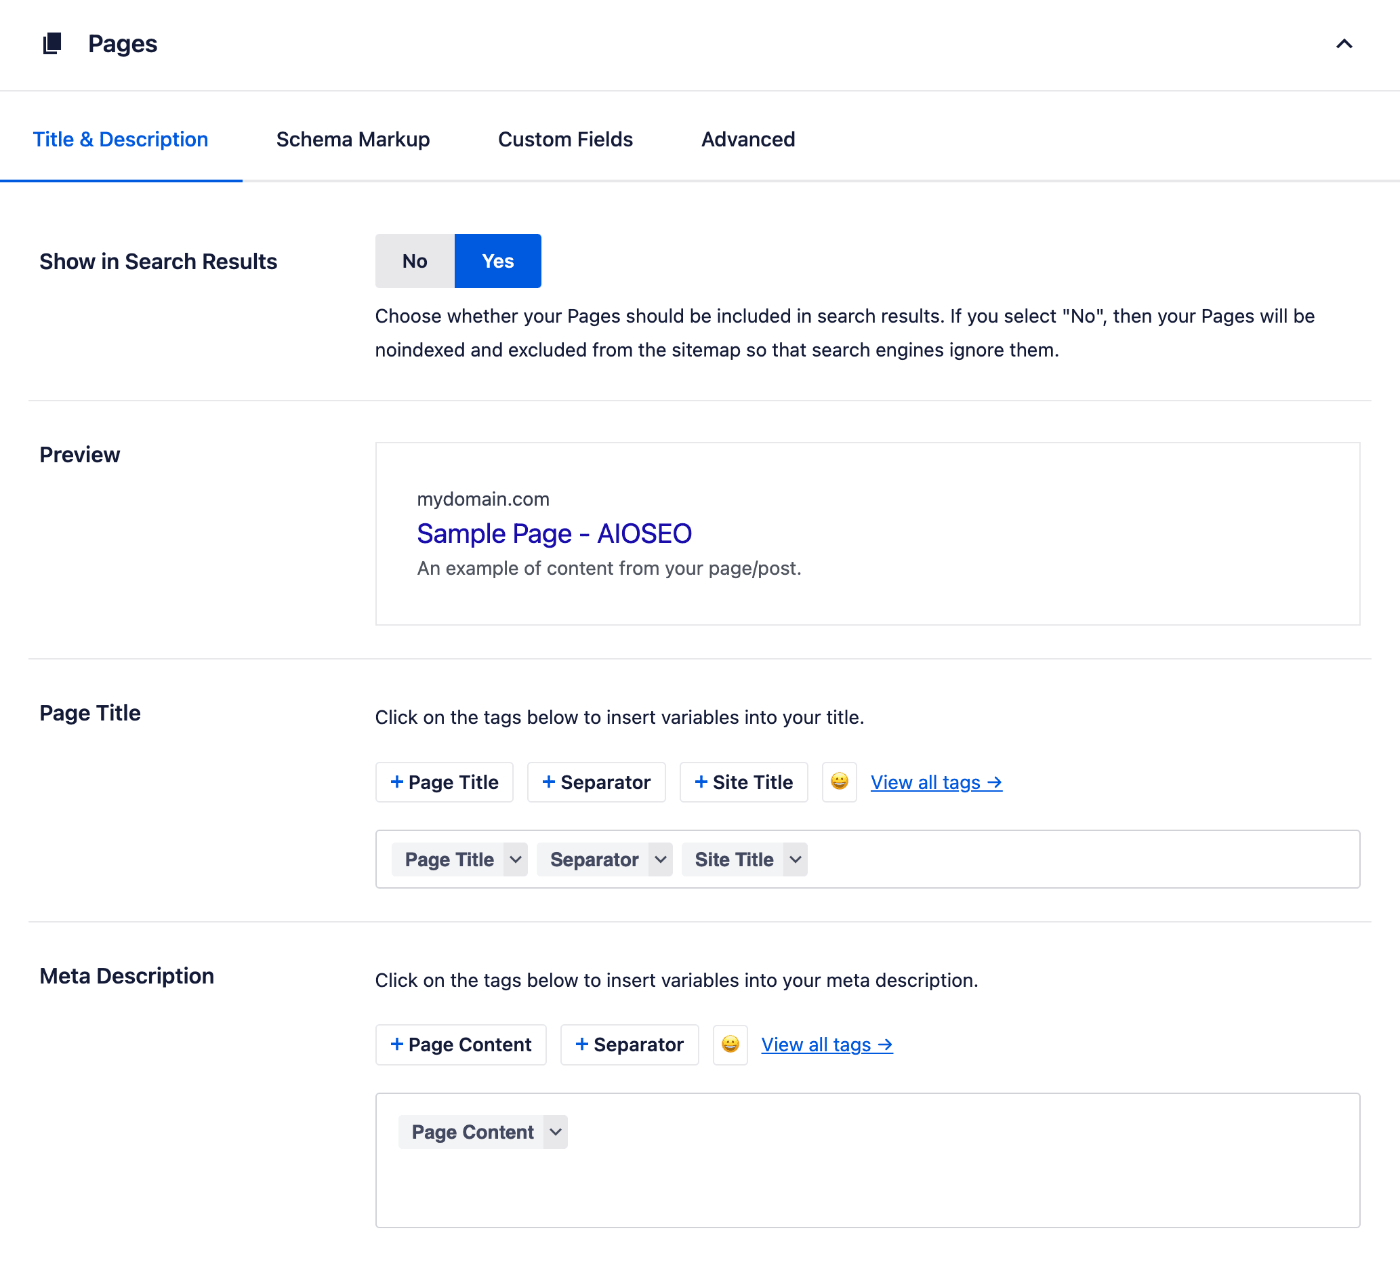
Scroll down and you should see a section for Pages where you'll see the Preview, Page Title and Meta Description.
NOTE:
These settings will be hidden if Show in Search Results is set to No. This is because you've chosen to not have your pages appear on search engines. Change Show in Search Results to Yes if you want your pages to appear in search engines.
The Preview shows an example of how your pages may look in search results based on the Page Title and Meta Description formats you set.
Setting the Page SEO Title Format
To set the SEO title format that will be used to automatically generate SEO titles for your pages, click on one of our smart tags shown above the Page Title field.

You can also type the hash character ( # ) in the field to display a list of available tags you can choose from.
You can also enter text in the Page Title field or combine text with the smart tags and there’s an emoji picker where you can add an emoji.
Whatever you set in the Page Title will apply to all your pages. However, you can override this in the Edit Page screen where you'll see a Page Title field in the AIOSEO Settings section.
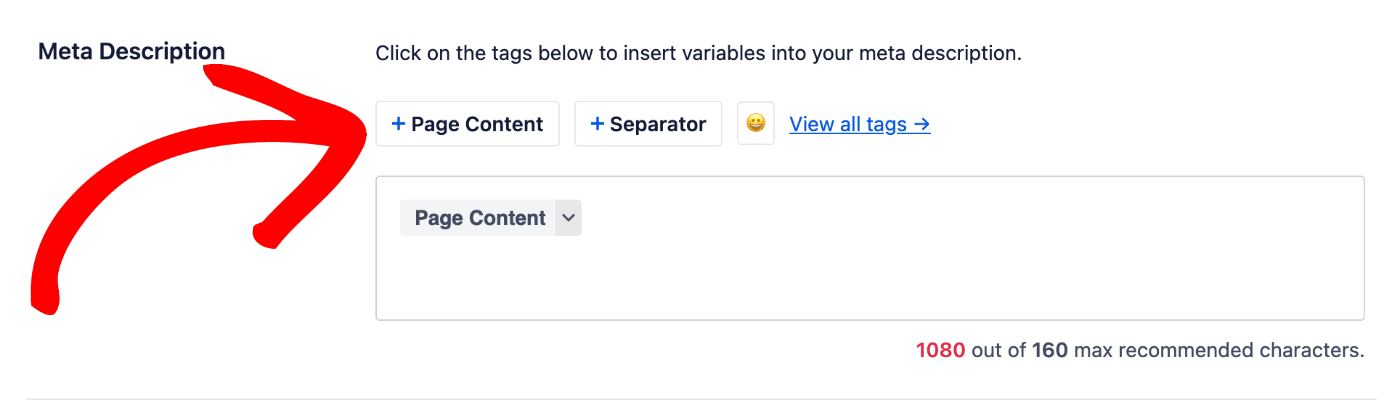
Setting the Page SEO Description Format
You can set the SEO description format that will be used to automatically generate SEO descriptions for your pages by using the Meta Description field.
This field works in the same way as the Page Title field. You can select from one of the smart tags displayed above the field, or type the hash character ( # ) in the field to display a list of available tags you can choose from.
You can also enter text in the field or combine text with smart tags and there’s an emoji picker where you can add an emoji.
Whatever you set in the Meta Description will apply to all your pages. However, you can override this in the Edit Page screen where you'll see a Meta Description field in the AIOSEO Settings section.
That’s all! You’ve now set the SEO title and description formats for your pages.
The post Setting the SEO Title and Description Format for Pages first appeared on AIOSEO.]]>This can be a huge timesaver if you have lots of posts.
Here we'll help you with easy-to-follow steps to automatically generate SEO titles and descriptions based on formats you can create.
In This Article
IMPORTANT:
Whilst it's possible to automatically generate your SEO titles and descriptions, this can lead to poor quality titles and descriptions which will be ignored by search engines. The best titles and descriptions are ones you write yourself.
Tutorial Video
Controlling SEO for Posts
To get started, click on Search Appearance in the All in One SEO menu and then click on the Content Types tab.
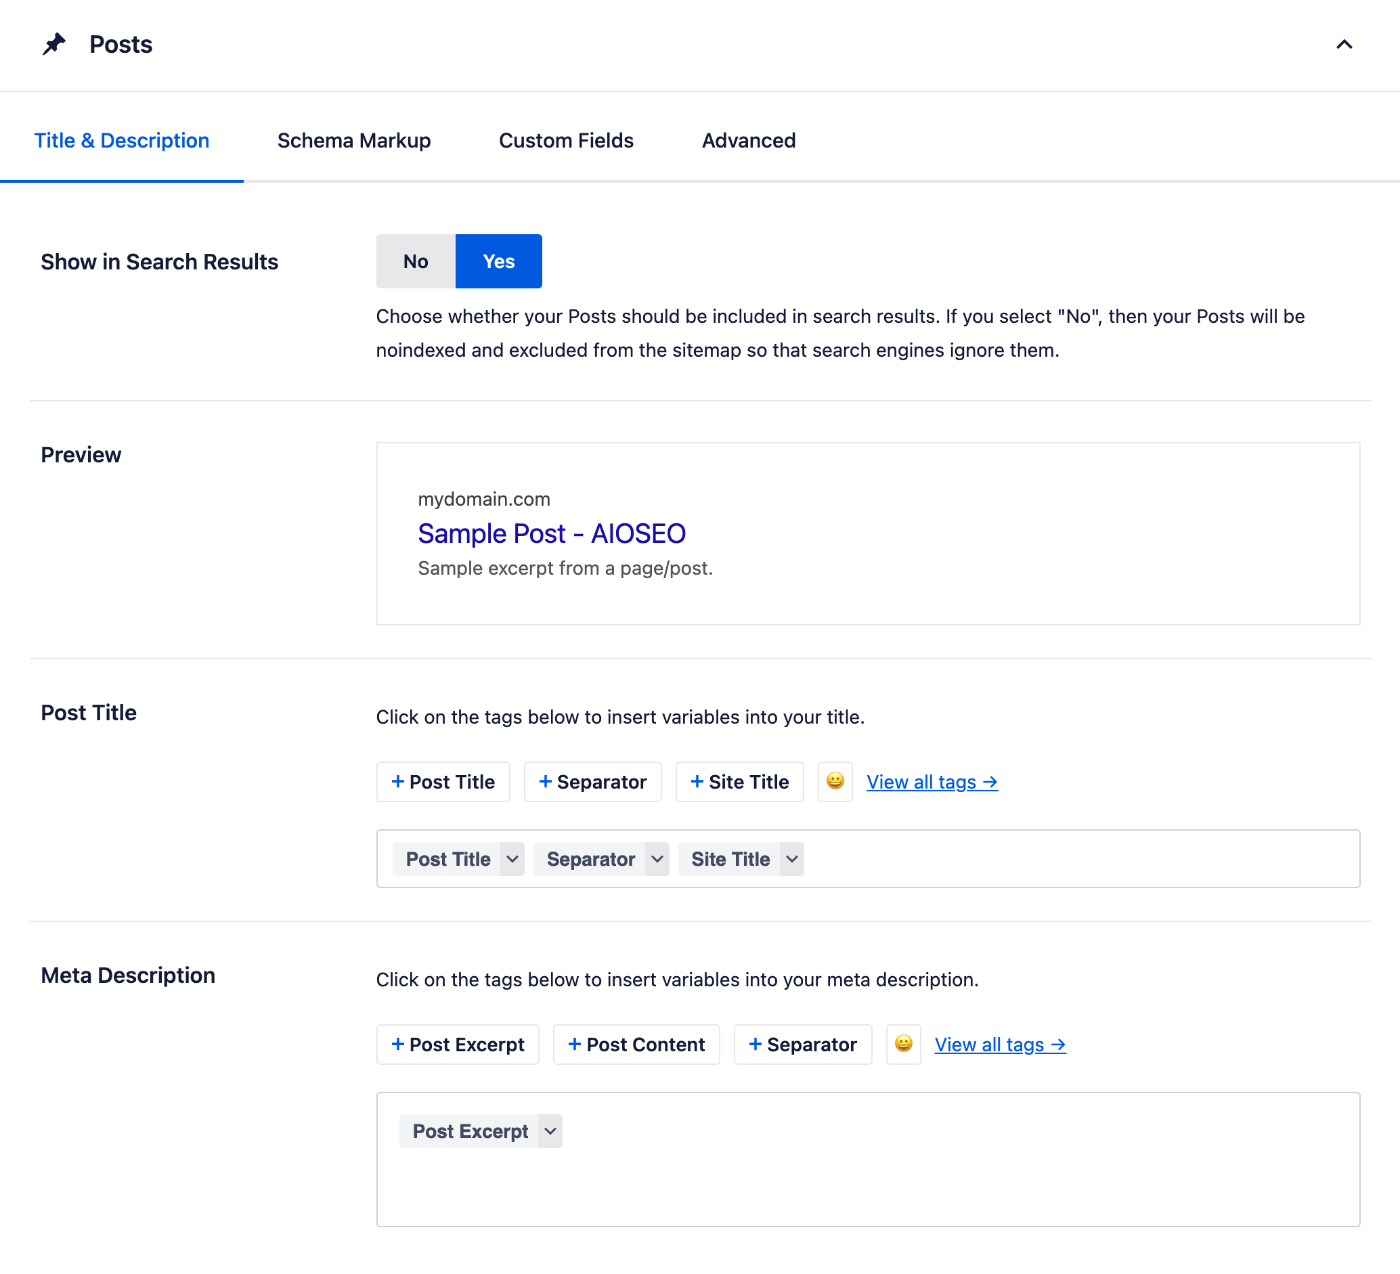
You should now see a section for Posts where you'll see the Preview, Post Title and Meta Description.
NOTE:
These settings will be hidden if Show in Search Results is set to No. This is because you've chosen to not have your posts appear on search engines. Change Show in Search Results to Yes if you want your posts to appear in search engines.
The Preview shows an example of how your posts may look in search results based on the Post Title and Meta Description formats you set.
Setting the Post SEO Title Format
To set the SEO title format that will be used to automatically generate SEO titles for your posts, click on one of our smart tags shown above the Post Title field.

You can also type the hash character ( # ) in the field to display a list of available tags you can choose from.
You can also enter text in the Post Title field or combine text with the smart tags and there’s an emoji picker where you can add an emoji.
Whatever you set in the Post Title will apply to all your posts. However, you can override this in the Edit Post screen where you'll see a Post Title field in the AIOSEO Settings section.
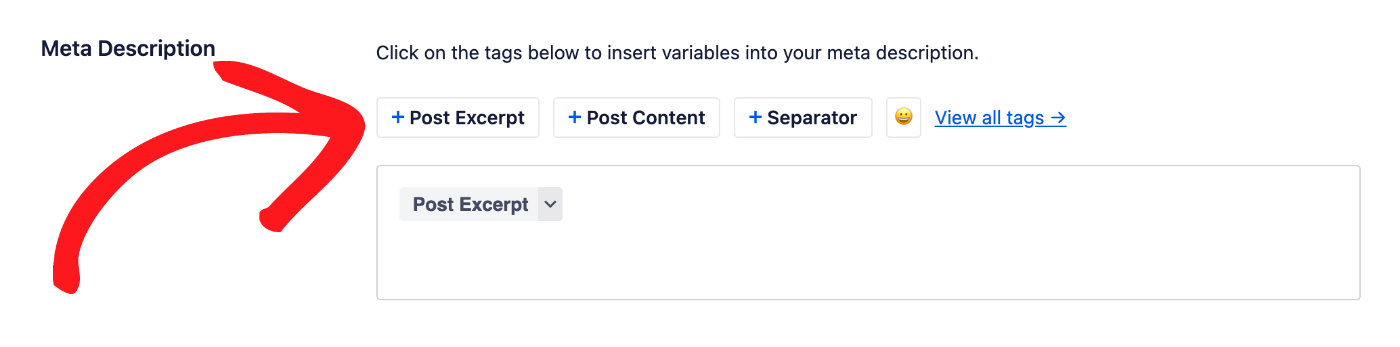
Setting the Post SEO Description Format
You can set the SEO description format that will be used to automatically generate SEO descriptions for your posts by using the Meta Description field.
This field works in the same way as the Post Title field. You can select from one of the smart tags displayed above the field, or type the hash character ( # ) in the field to display a list of available tags you can choose from.
You can also enter text in the field or combine text with smart tags and there’s an emoji picker where you can add an emoji.
Whatever you set in the Meta Description will apply to all your posts. However, you can override this in the Edit Post screen where you'll see a Meta Description field in the AIOSEO Settings section.
That’s all! You’ve now set the SEO title and description formats for your posts.
The post Setting the SEO Title and Description Format for Posts first appeared on AIOSEO.]]>For example, if you have a WooCommerce store then this can be a huge timesaver if you have lots of products.
Custom post types are content other than the standard Posts and Pages found in WordPress. They are usually added using a plugin or your theme.
Here we'll help you with easy-to-follow steps to automatically generate SEO titles and descriptions based on formats you can create.
In This Article
IMPORTANT:
Whilst it's possible to automatically generate your SEO titles and descriptions, this can lead to poor quality titles and descriptions which will be ignored by search engines. The best titles and descriptions are ones you write yourself.
Tutorial Video
Controlling SEO for Custom Post Types
To get started, click on Search Appearance in the All in One SEO menu and then click on the Content Types tab.
Scroll down and you should see sections for each of your post types. For example, for WooCommerce Products there will be a section for Products where you'll see the Preview, Product Title, and Meta Description.
NOTE:
The screenshots below show the settings for Posts, which are identical to the settings for each custom post type.
NOTE:
These settings will be hidden if Show in Search Results is set to No. This is because you've chosen to not have this content appear on search engines. Change Show in Search Results to Yes if you want this content to appear in search engines.
The Preview shows an example of how your content may look in search results based on the Title and Meta Description formats you set.
Setting the SEO Title Format
To set the SEO title format that will be used to automatically generate SEO titles for your content, click on one of our smart tags shown above the Title field.
You can also type the hash character ( # ) in the field to display a list of available tags you can choose from.
You can also enter text in the Title field or combine text with the smart tags and there’s an emoji picker where you can add an emoji.
Whatever you set in the Title will apply to all your content in that post type. However, you can override this in the Edit Post screen for your custom post type where you'll see a Title field in the AIOSEO Settings section.
Setting the SEO Description Format
You can set the SEO description format that will be used to automatically generate SEO descriptions for your content by using the Meta Description field.
This field works in the same way as the Title field. You can select from one of the smart tags displayed above the field, or type the hash character ( # ) in the field to display a list of available tags you can choose from.
You can also enter text in the field or combine text with smart tags and there’s an emoji picker where you can add an emoji.
Whatever you set in the Meta Description will apply to all your content in that post type. However, you can override this in the Edit Post screen for your custom post type where you'll see a Meta Description field in the AIOSEO Settings section.
That’s all! You’ve now set the SEO title and description formats for your custom post type content.
The post Setting the SEO Title and Description Format for Custom Post Types first appeared on AIOSEO.]]>This can be a huge timesaver if you have lots of categories.
This article will help you with easy-to-follow steps to automatically generate SEO titles and descriptions based on formats you can create.
In This Article
IMPORTANT:
Whilst it's possible to automatically generate your SEO titles and descriptions, this can lead to poor quality titles and descriptions which will be ignored by search engines. The best titles and descriptions are ones you write yourself.
Tutorial Video
Check out our video on how to set the SEO title and description format for categories below:
Controlling SEO for Categories
To get started, click on Search Appearance in the All in One SEO menu and then click on the Taxonomies tab.
You should see a section for Categories where you'll see the Preview, Category Title, and Meta Description.
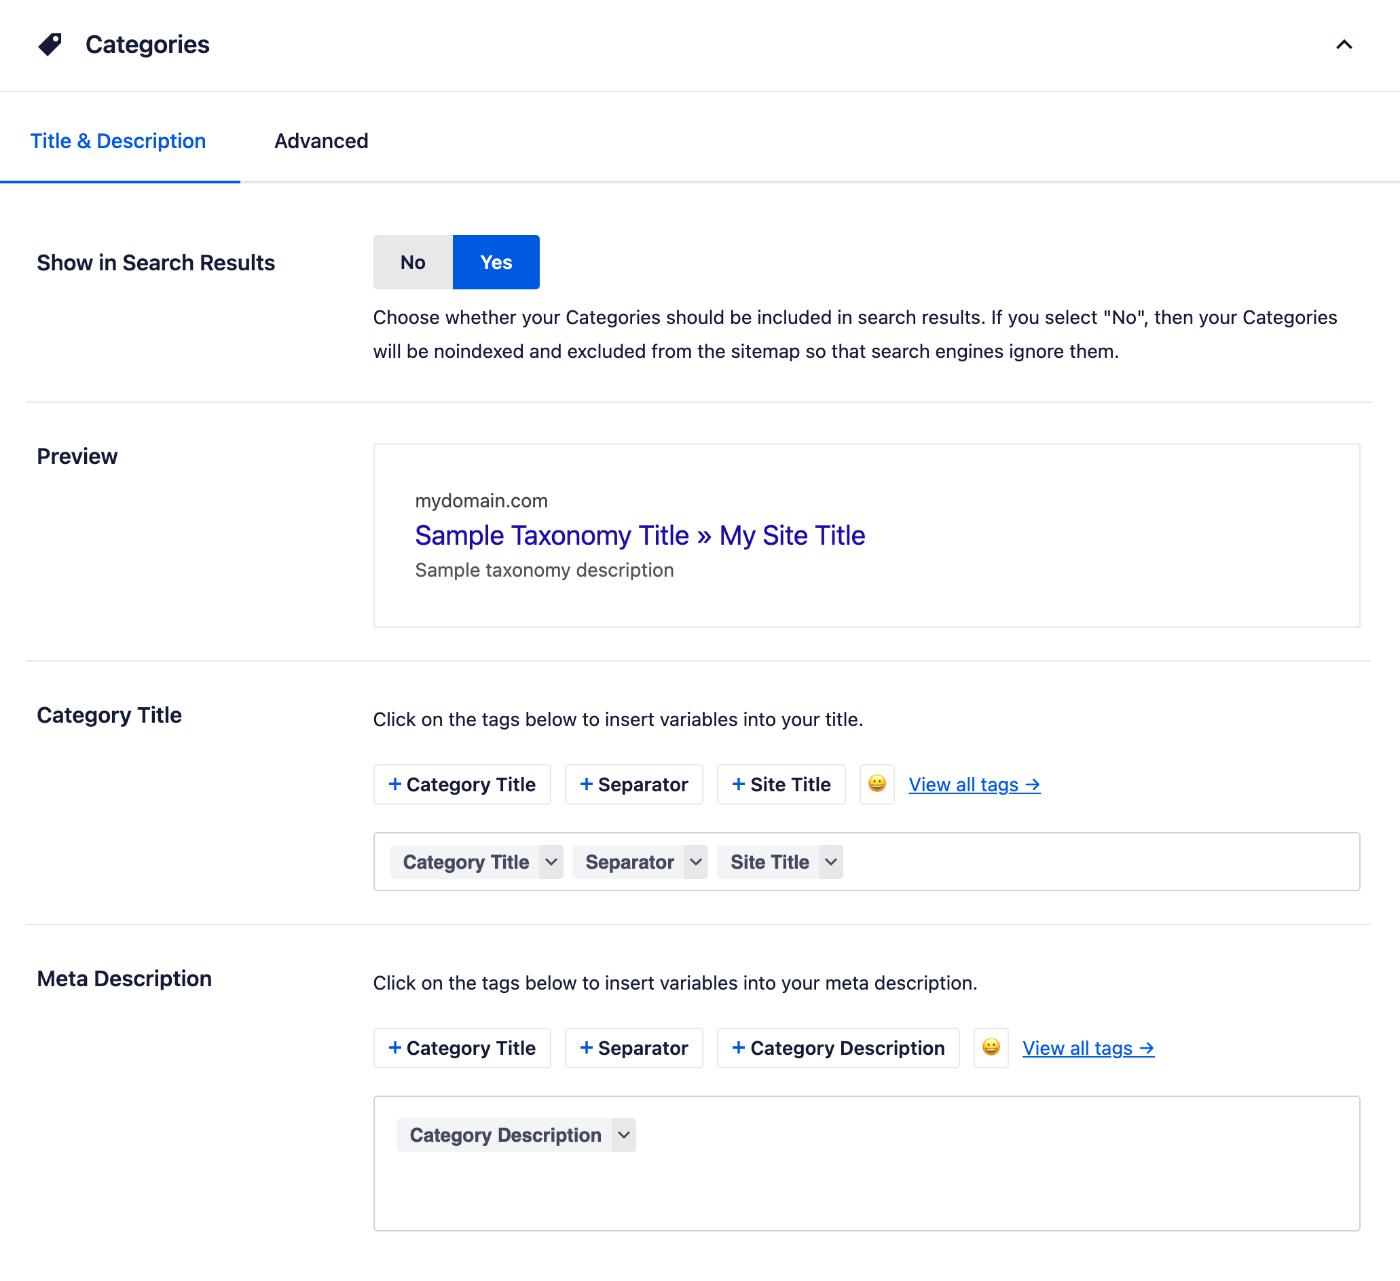
NOTE:
These settings will be hidden if Show in Search Results is set to No. This is because you've chosen to not have your categories appear on search engines. Change Show in Search Results to Yes if you want your categories to appear in search engines.
The Preview shows an example of how your categories may look in search results based on the Category Title and Meta Description formats you set.
Setting the Category SEO Title Format
To set the SEO title format that will be used to automatically generate SEO titles for your categories, click on one of our smart tags shown above the Category Title field.

You can also type the hash character ( # ) in the field to display a list of available tags you can choose from.
You can also enter text in the Category Title field or combine text with the smart tags and there’s an emoji picker where you can add an emoji.
Whatever you set in the Category Title will apply to all your categories. However, you can override this in the Edit Category screen where you'll see a Category Title field in the AIOSEO Settings section. This feature is available in All in One SEO Pro only
Setting the Category SEO Description Format
You can set the SEO description format that will be used to automatically generate SEO descriptions for your categories by using the Meta Description field.
This field works in the same way as the Category Title field. You can select from one of the smart tags displayed above the field, or type the hash character ( # ) in the field to display a list of available tags you can choose from.
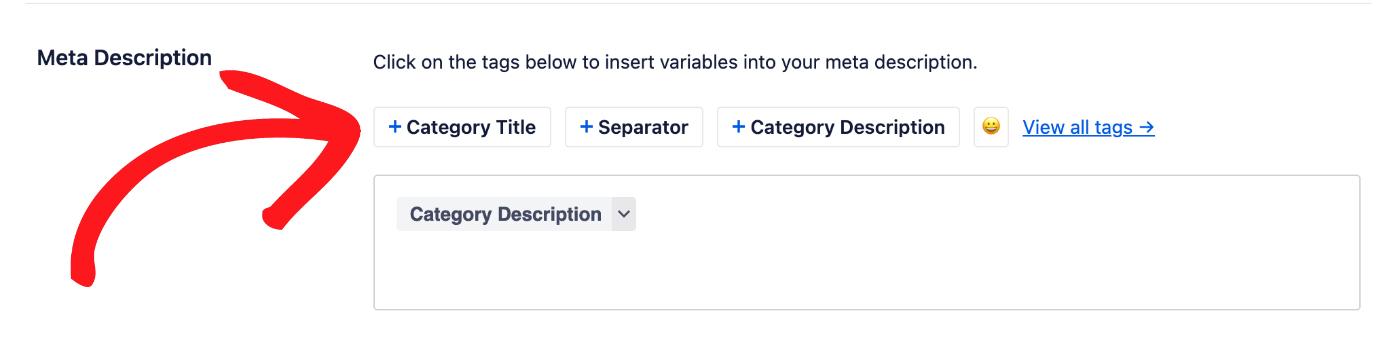
You can also enter text in the field or combine text with smart tags and there’s an emoji picker where you can add an emoji.
Whatever you set in the Meta Description will apply to all your categories. However, you can override this in the Edit Category screen where you'll see a Meta Description field in the AIOSEO Settings section. This feature is available in All in One SEO Pro only
That’s all! You’ve now set the SEO title and description formats for your categories.
The post Setting the SEO Title and Description Format for Categories first appeared on AIOSEO.]]>This can be a huge timesaver if you have lots of tags.
Here we'll help you with easy-to-follow steps to automatically generate SEO titles and descriptions based on formats you can create.
In This Article
IMPORTANT:
Whilst it's possible to automatically generate your SEO titles and descriptions, this can lead to poor quality titles and descriptions which will be ignored by search engines. The best titles and descriptions are ones you write yourself.
Tutorial Video
Here's a video on how to set the title and description format for your tags:
Controling SEO for Tags
To get started, click on Search Appearance in the All in One SEO menu and then click on the Taxonomies tab.
Scroll down and you should see a section for Tags where you'll see the Preview, Tag Title and Meta Description.
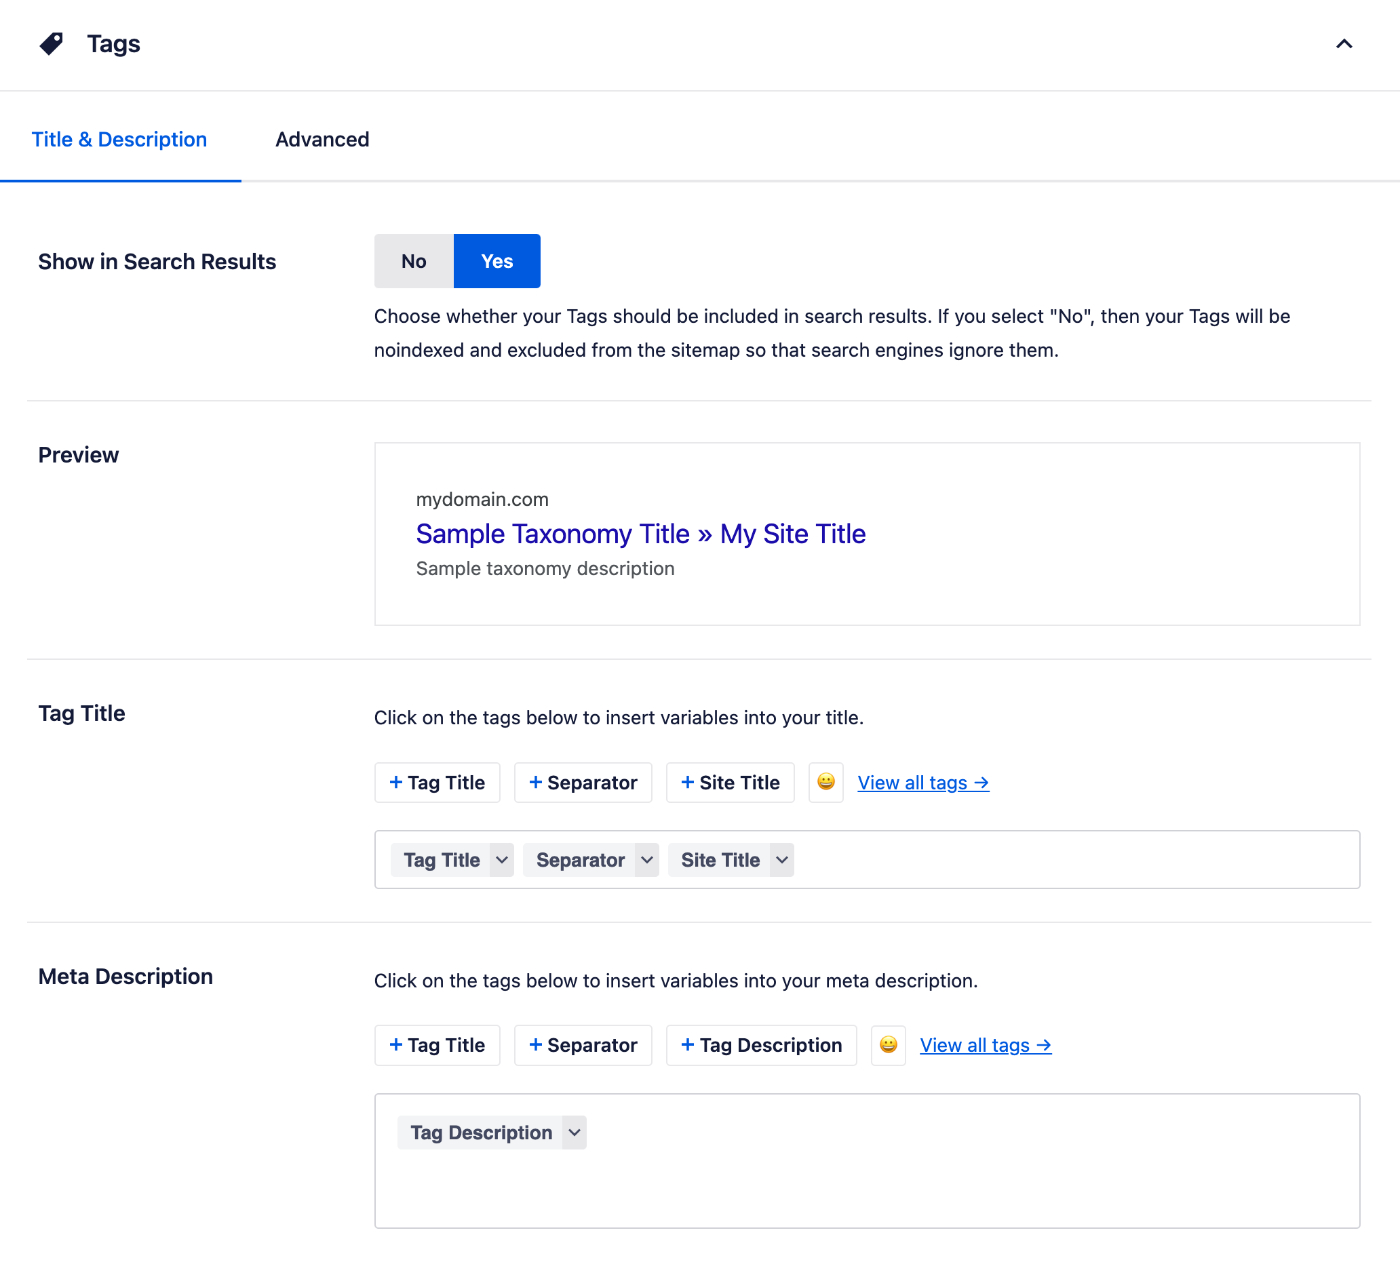
NOTE:
These settings will be hidden if Show in Search Results is set to No. This is because you've chosen to not have your tags appear on search engines. Change Show in Search Results to Yes if you want your tags to appear in search engines.
The Preview shows an example of how your tags may look in search results based on the Tag Title and Meta Description formats you set.
Setting the Tag SEO Title Format
To set the SEO title format that will be used to automatically generate SEO titles for your tags, click on one of our smart tags shown above the Tag Title field.

You can also type the hash character ( # ) in the field to display a list of available tags you can choose from.
You can also enter text in the Tag Title field or combine text with the smart tags and there’s an emoji picker where you can add an emoji.
Whatever you set in the Tag Title will apply to all your tags. However, you can override this in the Edit Tag screen where you'll see a Tag Title field in the AIOSEO Settings section. This feature is available in All in One SEO Pro only
Setting the Tag SEO Description Format
You can set the SEO description format that will be used to automatically generate SEO descriptions for your tags by using the Meta Description field.
This field works in the same way as the Tag Title field. You can select from one of the smart tags displayed above the field, or type the hash character ( # ) in the field to display a list of available tags you can choose from.
You can also enter text in the field or combine text with smart tags and there’s an emoji picker where you can add an emoji.
Whatever you set in the Meta Description will apply to all your tags. However, you can override this in the Edit Tag screen where you'll see a Meta Description field in the AIOSEO Settings section. This feature is available in All in One SEO Pro only.
That’s all! You’ve now set the SEO title and description formats for your tags.
The post Setting the SEO Title and Description Format for Tags first appeared on AIOSEO.]]>